After much research last week on the best ways to deal with some well-painted Skaven, my opponent Stuart completely out-manoeuvred me by turning up with his yet-to-be finished (barely started) Lizardmen.
My list:
G1 - Level 4 Spellweaver, BSB Noble, 20 Glade Guard
G2 - 10 Glade Guard
WR - Wild Rider Noble, 9 Wild Riders
Wd - Wardancer Noble, 8 Wardancers
D - 16 Dryads
Tk - 3 Treekin
Tm - Treeman
E - Great Eagle (x3)
His list:
TG - Slann Mage Priest, 21 Temple Guard
SW1 - Scar Veteran BSB, 24 Saurus Warriors
SW2 - Oldblood, 24 Saurus Warriors
Sk1 - 10 Skink Skirmishers
Sk2 - 10 Skink Skirmishers
Sk3 - 10 Skink Skirmishers
Sk4 - 10 Skink Skirmishers
St - Stegadon
T - 6 Terradons
Sa - Salamander
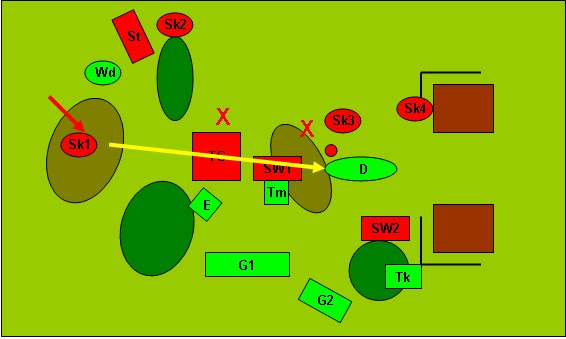
DEPLOYMENT

The scenario was Dawn Attack and Stuart had to deploy first and pretty much all of his rolls forced him to occupy the centre with a narrow deployment. Meanwhile, a few ones meant that my deployment was off to the left, with the Wild Riders and Dryads presenting a strong flanking force, whilst my Wardancers discovered that the wood on my right was a normal wood. We both advanced our vanguards on the flanks and prepared for turn one.
TURN 1

Stuart's first turn saw a general advance from the Saurus blocks, threatening to steamroller my flimsy line, and his Terradons, unable to do a fly-by this turn, moved into cover behind one of the two buildings. One of the Skink units discovered that the wood on his side of the board was a Blood Forest. In his first magic phase, what was to become a trend began in earnest when his Slann managed to cast Net of Amyntok on my large Glade Guard unit, forcing Strength test to avoid damage when moving, shooting and casting spells. Needless to say, S3 Elves didn't like the look of this.
In my turn, my Wild Riders moved to threaten the flank of the Temple Guard if they advanced, whilst my Treeman moved up into a blocking position in the third wood (a Wild Wood, no damage taken). The Wardancers dropped back away from the threat of the Terradons and the BSB passed his Strength test to switch to the smaller Glade Guard unit. Magic was non-existent as the Spellweaver failed his test and lost five Glade Guard for his trouble. Shooting was just as bad as the ever disappointing Hail of Doom Arrow was launched at the Oldblood's Saurus unit and only killed two of them.
TURN 2

The Saurus units advanced again and the Skirmishers engaged in more jiggery pokery behind the line. The Stegadon seemed to be being withheld for fear of the Wild Riders. The Terradons, still unable to get a fly-by off, moved behind the wood to my right to threaten a strafing run. Magic once again saw my Spellweaver's unit caught in the Net of Amyntok. The Salamander misfired and ate two of his handlers.
The battle began in earnest with two of my Eagles charging the exposed Salamander which didn't flee far enough. The Treekin also charged the Oldblood's unit. Meanwhile the rest of the Wood Elves went into movement overdrive. The BSB's unit of Glade Guard swift reformed to face the Terradons, the Wild Riders marched through a gap in the line to threaten the rear of the Temple Guard and were supported by the Wardancers using the Moonstone of the Hidden Ways to jump to the wood behind the Stegadon. The Dryads advanced again and the Treeman and third Eagle moved to block any sneaky charges. Magic was another damp squib, but shooting saw the Glade Guard mow down several Terradons and send the rest fleeing off the board. However, the Treekin were dismayed to discover that the Saurus Oldblood was packing the Blade of Realities and were broken for the loss of five wounds.
TURN 3

Suddenly surrounded by Wood Elves, the Lizards moved to protect himself from envelopment. The BSB jumped out of his unit to avoid a thumping from the Treeman and the Oldblood's unit charged the smaller Glade Guard unit, hoping to catch it in the flank, but simply stumbled forwards. The Temple Guard (threatened on three fronts) turned to face the greater threat of the Wild Riders, and the Skinks and Stegadon moved to avoid the Wardancers and pepper any viable targets with poisoned darts. The magic phase saw the Net of Amyntok finally stopped, but at the cost of Stuart being able to cast Speed of Light on his Temple Guard, which were now WS10, I10. Several volleys of poisoned saw off a couple of Wild Riders and one of the Eagles.
Trying to be more daring in my approach, and figuring I'd not get a better chance to take out the Temple Guard, I launched my Wild Riders and Dryads into the fray and the Treeman bundled into the unit facing him. The Wardancers cartwheeled about to threaten the Stegadon again and the Glade Guard unit (now both free to move) set themselves up to volley the Oldblood's unit. Now that my Spellweaver was free to cast spells, I discovered that for a myriad of reasons the Slann wasn't going to let me. Shooting saw the Oldblood's unit cut in half by Glade Guard and then the action turned to the fighting. The Treeman gave the Saurus a bit of a kicking, but they held, however the Dryads and Wild Riders bounced off the Temple Guard (partly due to Speed of Light, but I didn't help myself by forgetting to challenge with the Noble with the Annoyance of Netlings, who duly died) causing the Dryads to flee and leaving only three Wild Riders in combat.
The game was in the balance...
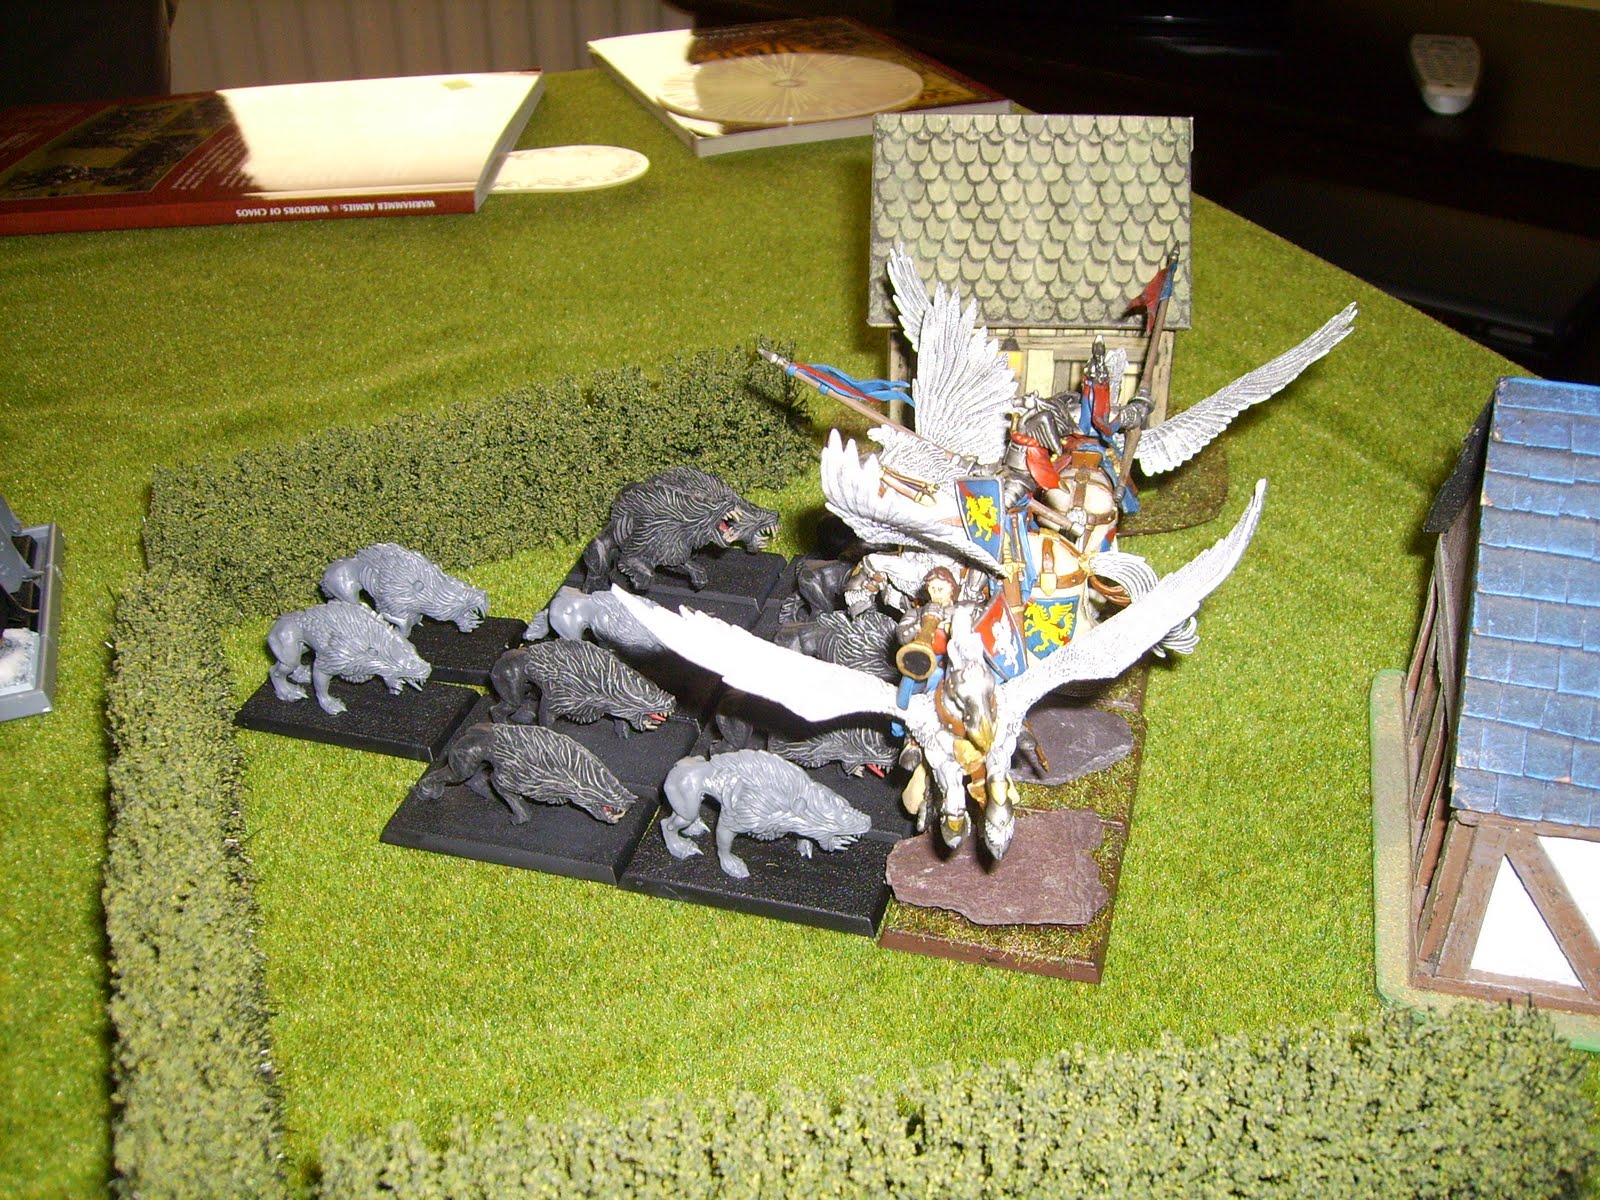
 I'm really finding this blogging lark to be an effective motivator for me; not only with regard to the Bretonnians, but in terms of gaming in general. I'm making good painting progress, I'm going out of my way to arrange more games, I developed a campaign systems and I've really got moving on a long dormant project (which will probably make its first blog appearance this week). All in all, the sense of comradeship I'm getting from this is inspiring probably my most productive period ever in terms of wargaming. Soppy stuff, but true.