Friday 30 September 2011

Zulus...fahsands of 'em!

I'm well chuffed. I got to play one of my 'I must wargame that' scenarios this week and it was a blast.


Let me explain. For reasons best know to myself there exists a list (in my head) of games, scenarios and settings that I've always wanted to play. The list includes the Battle of Wilson's Creek (ACW, I got to do that last year), the battle in the chapter 'The Uruk Hai' in Lord of the Rings, and a Punic Wars campaign (I ran one of those recently). Standing high up on the list is the actions of Isandlwana and Rorke's Drift, as detailed in the classic movies Zulu and Zulu Dawn. I've always been tempted to start collecting colonial miniatures, but I'm sure I wouldn't get enough use out of the to justify the expense and time investment it would take to collect appropriately sized forces.

Imagine my delight then, when the opportunity to play this scenario on a huge board with loads of painted models came up at our club. Kev, from 'Kev's Wargames Cabin' (see the link to the right), came to the club with a mahoosive collection of beautifully painted 15mm Zulus and Colonial British and a ready made scenario for a big multiplayer battle using rules adapted from Fire & Fury (a rules set I've not used before). I was in dreamland.

Rather than do my usual style of turn-by-turn battle report, due to the size and scope of the game I'm going to present this in five different sections to reflect the five different British players and their varying objectives and outcomes. I'll follow this with a brief review of Fire & Fury, as I experienced it. It's also worth noting that, by Kev's own admission, the scenario is a tribute to the movies and designed for good game-play rather than a faithful re-enactment of the historical action.

The Overview


The British Empire had declared war on the Zulus and determined to bring this war to a swift conclusion, Lord Chelmsford the commanding officer invaded Zululand. Making camp at Isandlwana, Chelmsford had divided his force, leaving Colonels Glynn and Pulleine at Isandlwana, whilst taking the best portion of his force to Ulundi, chasing rumours of Zulus. Meanwhile Colonel Wood's sizeable column was moving to meet up with Chelmsford whilst having received news of Zulu movements, Colonels Durnford and Rowlands advanced their native troops to reinforce the main column which they knew was marching into an ambush. Finally, Colonel Pearson had been left to garrison Rorke's Drift and hold it against enemy attack.

The Zulus, meanwhile, were moving about unseen, all that could be seen were dust clouds moving in the distance. Having all seen the films, we all knew that there were lots of them.

The British Commanders and their victory conditions were:

Trev - Lord Chelmsford - link up with Glynn and survive.
JP - Colonel Woods - link up with Glynn and survive.
Me - Colonel Durnford - link up with Glynn and survive.
Me (again) - Colonel Rowlands - either link up with Glynn and survive OR leave the table after being attacked.
Matt - Colonel Pearson - hold Rorke's Drift.
Brian - Colonel Glynn - survive AND collect water from the nearby watering hole.

We needed to achieve three of these objectives to win the game.

CHELMSFORD'S 'WAR'

Accompanied by the cream of the British army, the 'honourable' Lord Chelmsford was sure that he knew where the Zulus would be. He proceeded to send out scouts to explore the nearby dust clouds and discovered several small scouting parties of Zulus. He then proceeded to use the cream of the British army to destroy these small forces and performed in an entirely historical manner and completely failed to march to the sound of the guns (and the cries of "Trev, we're dying here!"). Chelmsford's command survived pretty much intact, but he failed to link up with Glynn. 1-0 to the Zulus.

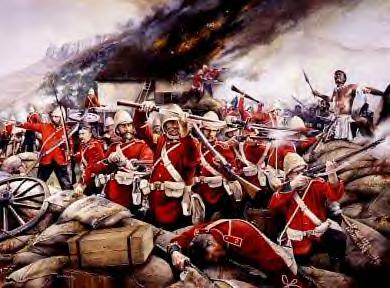
MEN OF HARLECH STAND YE STEADY...

The British troops stationed at Rorke's Drift found themselves assailed on all sides by Zulus, witha large war party repeatedly assaulting the barricades, whilst scouts fired down into the fortified encampment from the hillsides. Despite taking losses the dismounted cavalry and artillery managed to sweep away the scouts in the hills, whilst the infantry held firm behind 'a few feet of mealy bags' and drove off wave after wave of fearsome Zulu's. With a less than appropriate Michael Caineism of "Your only supposed to blow the bloody doors off!" Matt held firm. We were all square at 1-1.

LOST IN THE WOODS

Colonel Woods' column never really got a chance to even move to aid Glynn as they were immediately ambushed by several large forces of Zulus. Despite forming a presentable line (and even using their wagons as makeshift barricades, Glynn's left flank was quickly overrun despite the presence of a gatling gun. The right made a brave stand but were assailed on all sides and eventually cut down to a man. A great cry of "ZULU!" went up, but that was just JP getting carried away. 2-1 to the Zulus.

"THOSE NATIVES ARE RUBBISH"

Having all been told how bad the Rowlands' Natal Native Contingent were, it was unsurprising that they were the unclaimed command before the battle. Being the commander closest to the N.N.C., I took charge of this force. Early on, a small force of Zulus appeared on their flank, and so thoroughly expecting to die quickly I formed lines and awaited the inevitable. To my, and the Zulu's surprise, the N.N.C. not only held firm but drove back the Zulus several times. Eventually the Zulus were driven off by a surprise charge by the dismounted Border Horse. Realising that I still near to the board edge and having been attacked I could achieve a victory point by simply naffing off, I did just that. We were back at 2-2.

THE CRIMSON PIRATE

The command I had chosen was Durnford's Horse, mainly because I wanted to play Burt Lancaster. So complete with dodgy Irish accent I mounted up and galloped to relieve Glynn. Somewhat surprisingly, my three small units of irregular cavalry made it to Isandlwana. this was largely due to most of the dust clouds in my vicinity turning out to be just that, dust clouds. Therefore the first action Durnford saw was against the Royal Impi at Isandlwana itself. Having completed part of my objective I'll maintain the suspense and let the action move to...

"HOLD THEM! HOLD THEM!"


Things began badly for Colonel Glynn when his water wagons upon arriving at the watering hole, discovered thousands of hidden Zulus in the form of the Royal Impi. Despite the escort getting back to warn the camp and some form of defensive lines being formed, things went from bad to worse when another Impi appeared on the other side of the camp. Worse became awful when it appeared that due to a dice (suspiciously offered by a Zulu player) that could roll nothing but ones, the British couldn't hit the side of an elephant and were unable to slow the Zulu advance.

Things then went from awful to terrible when Brian realised that both Chelmsford and Woods were either unable or unwilling to ride to his rescue. The situation briefly dropped back down the awful when Durnford arrived, although popped back up to terrible when it turned out that Durnford's men couldn't shoot either. Terrible finally became catastrophic when the Zulus overran the final line of defence (which consisted of two officers and a rocket team). With the loss of the Sikali Horse, the remains of Durnford's command was forced to beat a hasty retreat.

The final score...4-2.

The whole game was brilliant. The scenario was well constructed and the game was played in an excellent atmosphere. With the film theme playing in the background, lines from the films being quipped and the British generally getting slaughtered, a good time was had by all. A big thank you to Kev for going to the effort of getting all his stuff to the club.

A Quick Review of Fire & Fury

I've never played Fire & Fury before (although I did own the rules many years ago - part of the whole Wilson's Creek thing) and I have to say that I was pleasantly surprised. I remember being slightly mystified by rules mechanisms completely beyond the frame of reference of a Warhammer junkie.

However, with people who know the rules to show you the ropes the rules proved quick to pick up and relatively intuitive. I appreciate that Kev had adapted the rules slightly, but I enjoyed the command and control mechanisms and the way in which the Zulus attacked in waves felt entirely appropriate. I'd be keen to try Fire & Fury in its intended ACW setting and now that I have a loose understanding, picking up the rules should be fairly easy.

As well as the game rules, I also enjoyed the scenario rules as the separate objective made us (well, most of us) have to ride into danger and act in character. The best historical game I've played in quite some time.

Monday 26 September 2011

September Progress Update

Well, it's been a chore, but I've done it (yes, I know the picture is terrible again).


A combination of starting a new job, the start of a new school year and simple Bretonnia fatigue have made getting these 12 fellas done a right pain in the backside. However, their arrival will see the end of the ever so faintly cheesy Reliquae Conga Line tactic I've been using, as they become a unit of 24 (25 with a Paladin on foot). They should strengthen the line a little and might even kill someing every so often.

I'm not overly proud of the painting, which is why I'm not too worried about the picture. They were quick and dirty and nobody will ever look at them too closely.


In addition to the Battle Pilgirms, I redid those 10 Wood Elves (an even worse picture), so my output this month hasn't been appalling, but it's been nothing to write home about either. I don't expect to be five pound better off and will be happy to hand over my money at the end of the month.

As I said, I'm a bit bored of Bretonnians at the moment, and I've just signed up for a Saga (a Dark Ages skirmish game) tournament in November, so given the fact that I don't own any suitable models, my October target will be a warband of Vikings - about 30 models - no pressure...

I'll be trying out Saga for the first time in a few weeks and so will review the game then (it had better be good if I'm going to kill myself painting for it).

Saturday 24 September 2011

Haven't we been here before?

Thursday saw my Bretonnians once again match blades with Craig's Tomb Kings. It was a 1600 point game and the scenario was Blood and Glory. This was the same scenario we played last month, however, atleast it made a difference from Meeting Engagement.

My army was unchanged from last time out against the Empire. Craig had brought a Tomb Prince, a Level 4 Heirophant, a Level 2 Liche Priest (Lore of Light), 30 Skeleton Warriors, 10 Skeleton Archer, 6 Skeleton Light Cavalry, 3 Necropolis Knights, a Colossus and a Casket of Souls.

I deployed with my Pegasus Knights threatening to move round the left flank and the Knights Errant positioned out right with the same intention. My plan was to get one of the two units to the damned Casket of Souls to protect me from its spell and rob Craig of the bonus power dice it grants. My Knights of the Realm were positioned near to the Knights Errant to support their advance and ideally slam into his Chariots. In my centre I had my Peasants who would initially hold position and then the Men at Arms and Grail Reliquae would advance to support my Knights in combat.


Craig deployed with a bit of a refused flank with the Casket in the centre (behind a house, coward!) and only the Chariots to its left. On the right the Skeleton Warriors, Archers and finally the Colossus stretched out to the right. Craig scouted his cavalry off my far right to threaten my Trebuchet and the Necropolis Knights were inevitably entombed. The positioning of Craig's army made me bring the Pegasus Knights into the centre as I could see a route around the flank which wouldn't get them charged by the Colossus.

Turns 1 & 2

The early stages of the game saw things going well for me. Despite weathering a storm of shooting and magic, the Pegasus Knight charged the Archers and Liche Priest in the first turn, killing most of the unit and, more importantly the wizard (goodbye Speed of Light). The following turn saw them charged by the Colossus, but he failed to make an impact and the Archers were finished off and the Pegasus Knights even crumbled a wound off the big guy.

The Trebuchet hit the chariots and took one out, and reduced another to a single wound. Although Craig managed to heal some wound back on them, they were subsequently destroyed by a combined charge from the Knights Errant and the Knights of the Realm (who even risked charging through a wood).


Turns 3 & 4

The Knights continued their flanking move as the Knights Errant overran into a position to charge the Casket, which was destroyed in short order, whilst the Knights of the Realm steamrollered the Colossus which had finally put the remaining Pegasus Knight to flight. The sheer weight of attacks was too much for the bone giant and it too was destroy. Things seemed to be going well...

Whilst the flower of Bretonnian chivalry was slaughtering their merry way across the field, things were about to get dark for the humble peasantry. Firstly, the Grail Reliquae I had positioned to slow down the block of Skeletons broke, despite being stubborn, and fled. This panicked the Men at Arms (along with my Prophetess). Then the Necropolis Knights popped up and charged the Peasant Bowmen, who bravely changed formation to gain a rank bonus which couldn't stop them from being broken as well. They were caught and the pursuing Necro Knights caused the Men at Arms to flee even further. The panicked (and so unable to fire) Trebuchet was then charged and destroyed by the Skeleton Cavalry. The final insult was that the Men at Arms failed to rally and ran off the board.


Turns 5 & 6

Despite the damage I had caused, I was on the brink of defeat. The destruction of any one of my three remaining banners would hand Craig the game. Meanwhile, I had to destroy his Tomb Prince (who was safely ensconced in the unit of Skeletons and no doubt had magic armour and a ward save) to win. There was only one thing to do...CHARRRRRGGGGEEEEE!!!

The Knights of the Realm charged the Skeletons' front and the rallied Battle Pilgrims charged the rear. The following turn, the remaining Necropolis Knight came into my flank. Finally the last Pegasus Knight and the Knights Errant piled in to join the fun. Despite the volume of attacks I'd thrown in, the Bretonnians had clearly used up their real lances and had fallen back on the rubber ones. The wounds that did get through to the Heirophant were saved by his magic bangles.


The battle was to be decided by a duel fought between the Tomb Prince and my Battle Standard Bearer. Despite initially making headway, the noble Paladin was brutally cut down by the foul Mummy and the game was over.

So, what did I learn?

Being more aggressive with the Knights was good and the ploughed through what they hit when I got to choose the target. However, they really struggle with ranked infantry - I needed the Men at Arms in that fight at the end to add combat resolution and removed ranks.

I was foolish to advance towards the skeletons with my Peasants. I should have used the Grail Reliquae and Men at Arms to protect the Archers and Trebuchet and tried to pound that unit into the dust. I knew the Necropolis Knights and Skeleton Cavalry were coming but really took no measure to defend against them.

Once again, defeat was mainly down to panicking Peasants. In time, I intend to build a unit of Questing Knights who will stay with the BSB in my own half, whilst a Lord (yet to be built) rides off with the Knights. This should help with the problem.

Finally, I once again forgot about the objective of Blood and Glory. I should have concentrated on destroying the Skeletons (and the Tomb Prince) but once again I spent my time mopping up support units. I think I'm still suffering from being a Wood Elf player, skirting round the edges rather than getting stuck in.

Next up is the Empire again in two weeks. Next week I'm getting all historical in a multi-player Zulu game. "Front rank...FIRE!"

Saturday 17 September 2011

Cannon to the left of them, cannon to the right of them...

As I mentioned in my last post, this week I played Matt, whose preferred army in WFB has always been the Empire (a curiously rare army choice round these parts), and so for the first time I was looking at crossing lances with an army that almost certainly wouldn't be in a rush to close with me. I'd have to make the running, so to speak. Indeed, I realised how fast that running would have to be when Matt unpacked his 1600 point army:

Mounted Warrior Priest
Level 2 Wizard (Lore of Light)
Level 1 Wizard (Lore of Metal)
BSB on Foot (carrying the Griffon Standard)
40 Swordsmen
2 x 10 Hand Gunners
10 Empire Knights
3 Great Cannons
1 Hellblaster Volley Gun

It's worth mentioning that Matt hadn't previously played a game of 8th edition, but he'd clearly got the gist of what works these days. Ouch!

The only changes to my army were that I'd dropped the Crown of Command and Channelling Staff (or 'Expensive Stick' for all the good it was) on the Damsel in exchange for the Mane of the Purebreed and a Dispel Scroll. It was apparent that I would have to get to grips with Matt as soon as possible otherwise his gun line (let's call a spade a spade) would tear me apart.

The scenario we rolled was Meeting Engagement (third time in three games) and Matt deployed first. He deployed around a hill with the Knights on the left and the Swordsmen and Detachments on the right. Two cannons were placed on the hill with the third on the far right of his line. The Volley Gun was placed below the hill on the right with some Hand Gunners and the Light Wizard. The Metal Wizard had clearly not set his alarm and would be arriving from reserve.

I would be attacking the Empire's line through several woods (Matt was delighted to hear that they don't stop cannon balls. The Knights of the Realm and Knights Errant were deployed opposite the Swordsmen as I had an idea that I could slam both units into their horde formation. The Peasant Bowmen set up between two woods (to protect them from the Empire Knights) where they could target most of the line and the Grail Reliquae and Pegasus Knights were on my far right looking to flank Matt's line. The Men at Arms would be arriving from reserve.

Being new to 8th edition, Matt was less than delighted to learn all about the Vanguard move as my Pegasus Knights flapped neatly into his flank, threatening a first turn charge on the cannons on the hill (I knew I'd be going second as I would be praying).

Turn 1
In true gun line style, the movement phase was over quickly as the cannons on the hill swivelled to face the Pegasus Knights and the Metal Wizard came scurrying on behind them. Matt put 6 dice into trying to cast Searing Doom on the Pegasus Knights, but he failed to get irresistible force and I was relieved to be able to use my newly installed Dispel Scroll. Matt's luck didn't get any better in the shooting phase as all three cannons fell short of the mark and the volley gun was out of range of the knights. At least one of the Hand Gunner units was able to kill three Peasant Bowmen.


Having failed to bring down the Pegasus Knights, the cannon crew braced for impact as they were charged. The Men at Arms came on behind the Pegasus Knights and the Grail Reliquae moved up in support of them. From my left came the sound of drumming hooves as both of my Knight units galloped across open ground, aware that they'd had a lucky escape, but that their luck might not hold. An uneventful magic phase was followed by an excess of action. Although the trebuchet misfired, the Peasant Bowmen found their range and killed five Hand Gunners with a single volley. This was followed by the predictable slaughter of the cannon crew by the Pegasus Knights (who then overran into the next crew) and the Empire Knights panicking and running off into the woods, where four of them fell off their horses and died. All in all, a pretty good turn one for me.

Turn 2
The Empire Knights rallied...and the movement phase was done. The Light Wizard cast Speed of Light in an attempt to save the cannon crew (or at least hold the Pegasus Knights for a turn) and miscast, frying three nearby Hand Gunners. With two cannons out of action and eight Hand Gunners dead, I'd done well in reducing the incoming fire, however it wasn't enough. I was briefly hopeful when the final cannon only brought down a single knight (the Damsel head-butted the cannonball to safety with the aid of the blessing), however the Hellblaster was now in range. Twenty-something shots, resulted in 16 hits and eleven wounds. Armour and the blessing had a little impact as five Knights were slaughtered. The Hand Gunners polished off the last two and both the BSB and Damsel were left wondering where their unit had gone. Ouch! On the up side, despite magical interference, the Pegasus Knights slaughtered another cannon crew and reformed to get a bead on the Light Wizard.

With the Knights of the Realm gone, charging the Swordsman Unit to the front was out of the question. So the Knights Errant, BSB and Damsel bravely decided to all gang up and charge the remaining cannon crew with the intention of going off the board for protection should the Hellblaster survive. The Light Wizard fled the Pegasus Knights, who redirected into the Hellblaster Crew. The Men at Arms tried to get themselves between the Empire Knights and the rampant Pegasus Knights. Magic was once again weak for me, but shooting saw the Peasant Bowmen finish off the last two Hand Gunners of the left detachment and the trebuchet found its marks and slaughtered fifteen Swordsmen! The last of Matt's war machine crews were butchered in close combat and the Knights ran off the table whilst the Pegasus Knights stayed still (I really should have done something with them).


Turn 3
The first two turns had seen the Empire take heavy losses, but they were about to claw their way back into the game. The Empire Knights charged the Pegasus Knights in the flank whilst the Swordsmen reformed into a tighter formation and advanced with the remaining Hand Gunners. The Light Wizard rallied and cast Speed of Light on to the Empire Knights. With no shooting, combat saw the heroic Pegasus Knights beaten and run down.

The Empire were now bunched together, I saw a chance to trap them between two forces. The Men at Arms and Grail Reliquae moved up closer whilst the Knights Errant and Heroes returned to threaten the rear. With my own troops so close, I didn't risk a trebuchet shot and for the first time in the game, the Peasant Bowmen missed as they tried to snipe a Wizard.

Turn 4
The Empire Knights swift reformed and with the Speed of Light still in effect, were able to move out of my Knights' charge arc to present a full battle line. The Metal Wizard jogged to the top of the hill and failed to cast Searing Doom at the Knights Errant and the Light Wizard miscast again, this time killing a few Swordsmen. The Hand Gunners killed a couple of Bowmen.


Seeing that I had to do something before Matt's combined army pounced on one part of my spread out forces, I charged the Men at Arms into the Knights. I also moved the Grail Reliquae up to try to prevent a flank charge by the Swordsmen and positioned the Knights for a charge next turn. Hexes and augments a plenty were cast to try to tip the fight in my favour and the Bowmen traded shots with the Hand Gunners. In combat, the Men at Arms won but were unable to break the Knights (thanks to the proximity of their BSB).

Turn 5
Once again I'd misjudged my blocking move as the Swordsmen were able to flank the Men at Arms. The Light Wizard augmented the Swordsmen and the Hand Gunners failed to shoot any Bowmen. This time the Men at Arms were soundly beaten, and despite being steadfast, their pitiful Leadership of 5 saw them running for the hills to be cut down by pursuing Knights. The Swordsmen reformed to face the Knights Errant.

My Knights charged the front of the Swordsmen and the Grail Reliquae charged the rear. Again Wyssan's Wildform and Harmonic Convergence were cast on the Knights. The Bowmen brought the Hand Gunners down to three and the trebuchet took a pot shot at the Empire Knights and missed. Despite the Speed of Light and the Griffon Banner, the Swordsmen were beaten. However, they were still steadfast with the BSB's re-roll to fall back on. Fortunately Matt showed that he hasn't lost his knack for failing Leadership tests (our many Empire vs. Vampires games had predictable results due to Matt's innate talent of rolling high at the wrong moment) and the Swordsmen fled and were run down by the Knights Errant.


Turn 6
The last turn saw very little happen, save for a lucky trebuchet shot wiping out the Warrior Priest and the remaining Empire Knights. I'd won, but I ended a lot closer than it looked like it would after the first two turns.

This was a game where I have to admit I got lucky. It wasn't one sided luck throughout the game, but Matt's first turn was so ineffective that it was like me having the first turn. For three cannon shots to fall short and his magic to also be wasted was nothing short of unlucky. Had he taken out the Pegasus Knights, my army would have been pummelled by cannonballs throughout the game. However, the mauling from the Hellblaster (which Matt identified would have been better placed on his flank) was horrific and has taught me that I've got to consider cover when placing terrain in the future. I suspect Dwarves, Empire and possibly the new Ogres will always be tough nuts to crack for Bretonnians due to their artillery.

I need to be careful about splitting my army up as my units are very vulnerable on their own. The peasants need either or both of the General and the BSB nearby to withstand combats and the Knights have vulnerable flanks and can be easily outlasted by infantry. Again, a turn of luck broke the Swordsmen; had they held, the next round of combat could have easily gone the other way and tipped the game for Matt.

Finally, although Searing Doom was never cast, I was always conscious that it was lethal to my Knights. I need to consider how I'm going to make sure that Metal Wizards don't survive very long.

Overall a good game which, hopefully, has brought Matt back into the WFB fold after a long absence and which has forced me to think about fighting in a more aggressive style. Next up, a campaign game against Craig's Tomb Kings...I thought I played too defensively last time we met, so maybe it's time for a little bit of 'Tally Ho!'

Friday 9 September 2011

Clash of Empires...and eras

I finally got round to having a game of Clash of Empires on Thursday. Tom was kind enough to guide me through a game - although as a (not very experienced) Warhammer Ancient Battles player I soon found that I didn't need too much guidance - more on that later.

In a typically unhistorical historical game (it's amazing how few historical games actually are historical), my Late Hoplite Greeks faced Tom's Normans. If history's not your thing, about 1300 years separate these two armies, so it's a bit of a mis-match in terms of style. Also being a demo game, I won't go into too much detail.


I deployed in typical hoplite formation, although my elites were on my left when they should be on the right (oh, how the academics would cringe). My flanks were supported by peltasts and I had some Cretan archers and light horse out front. Tom spread his heavy horse out to the flanks (there's a surprise) and his footmen and crossbows faced the phalanx.

In short, he advanced towards me. I repositioned a little. He charged the centre of my lines and largely bounced off (as happens when you send horses against a wall of spears). On the right flank, my Cretans shot up one unit of Normans before legging it, whilst on the left my peltasts were put to the sword and it looked as if my flank would be turned.

Fortunately, my elites, who panicked when the peltasts broke, gathered their wits and reformed in a great defensive position. Meanwhile, Tom's foot troops and third cavalry unit reformed and charged again...and lost again. This time they panicked the general and the game was over.


There was more to it than that but I want to get to the review of the game.

All in all Clash of Empires is a good game. However, I was bound to say that as I like WAB and this game seems to be WAB in disguise. The stat line may be different, but the dice you are rolling (and the numbers you want in certain situations) are exactly the same. Even the special rules (like the Greek phalanx rules) give almost exactly the same benefits as in WAB. As an example, I've played a few games with the Greeks against an El Cid Christian army (basically similar to the Normans) in WAB and they played out almost exactly the same as this one - it was so similar that felt like deja vu in parts.

This is not to say that I didn't like Clash of Empires, far from it. Indeed, some of the difference between CoE and WAB were really good. I liked the opening phases of the game with different command ratings and tactical terrain deployment, and I really liked the commanders' role in the game - the actually command rather than become the superheroes they are in WAB. Also the combat results table seemed to add a bit more variety and interest and the disorder rules add a bit more realism to combat.

Add to this the fact that the support the company are giving to the game seems excellent. There's already a supplement due out and there are loads of free army lists for all kinds of periods available through the Great Escape Games website which is all great for the gamer. Compare this to the well documented lamentable product support for WAB from Warhammer Historical over the years and CoE could grab itself quite a few converts.

In terms of things I don't like, they're pretty much the things I don't like in WAB. The super scary Norman cavalry, which I personally think are over the top are at least a little less over the top in CoE. I've never been too keen on the fact that one panic test can kill an entire game - although it does add tension.

So overall, I quite liked it and would be happy to play it again. Indeed if my regular gaming circle picks up CoE instead of WAB, I wouldn't have any problem switching as I think that it will turn out to be a better game. However, I can't shake the feeling that I don't really want to spend money on a rulebook and the forthcoming supplements for a game that is eerily similar to one I already own. CoE is a good game with some nice elements, but it just doesn't bring anything fundamentally new to my gaming table.

The Eye Is Closed...

You may recall the kicking my ill-disciplined rabble took from Lee's Chaos army back in August. When my knights charged they were cut down in short order and panicked the rest of the army off the table. Well, Lee challenged me again as a part of the campaign I'm running and I was concerned that the result would be rather similar.

The game was 1600 points and to save time I took the same list that I used against Aneurin's High Elves. Lee fielded two Level 2 Sorcerers (one with the Lore of Fire and one with the Lore of Death), 10 Chaos Knights, 20 Chaos Warriors, 5 Marauder Horsemen, 5 Chosen Warriors, a Warshrine and a Chariot. The scenario was a Meeting Engagement and it wound up that I would be defending a Grail Chapel (which according to our campaign I had built in the territory Lee was attacking). The reserves rule meant that my Knights Errant and Pegasus Knights would be arriving late, whilst Lee would be forced to leave both of his Sorcerers off the table.

I deployed around the Grail Chapel trusting that gaining regeneration and stubborn might keep them in the fight against the iron tide. I also had a cunning plan in mind involving both the reserve units I was going to receive and the ever useful Grail Reliquae (which was deployed a little forwards), along with a shifty manoeuvre that would make use of the Peasant Archers' portable fence. I had to hope that this would be enough.


Taking the opportunity to deploy as close as he could, Lee put his armoured fist of Warriors and Knights (supported, as ever, by the Warshrine) directly opposite my small battle line. The Chariot and Chosen were place to threaten my left and provide a convenient escort to the oncoming Sorcerers. It looked like his plan came from the ubiquitous Chaos tactical doctrine of 'advance and crush them!'

Turn 1
With my forces praying as usual, Lee took the first turn and surprise, surprise, the armoured fist advanced towards me at pace, with the Knights getting to within charge range of the Peasant Archers (that wasn't going to be pretty). The Sorcerers came on to join the Chosen and began to move around my flank. Despite a good roll in the magic phase, coming on from reserve meant that most of Lee's spells were out of range or line of sight and the spell he did cast caused no damage on anybody but his Death Sorcerer because the Fire Sorcerer miscast. In the shooting phase, the Warshrine granted the Chaos Warriors magical resistance. Time to spring my trap.

The Grail Reliquae moved towards the Chaos Warriors, whilst the Knights Errant positioned themselves in their flank, whilst the Pegasus Knights swooped around their rear. I knew that none of these units could hope to beat the Chaos Warriors, and even if they charged together, they'd probably lose, however I was gambling on the idea that Lee would see them as a potential danger and turn the Warriors to protect their flank, thus disrupting his battle line and give me time to gang up on the Chaos Knights.

Meanwhile, I pulled my other stunt. I pulled the Archers back into the Grail Chapel, and thus left their fence between the Chaos Knights and the Men-At-Arms, who gained the Blessing of the Lady from the Prayer Icon of Quenelles. I was under no illusion that the Men-at-Arms would die in droves to the Knights, but again I was gambling on the potential damage from Dangerous Terrain tests would deter Lee from charging.

Finally, in what I like to think was a surprise move, I marched my Knights of the Realm (and their Leadership) away from the Peasants and toward the small unit of Chosen and Sorcerers. Again I was looking to threaten Lee where he was weakest to either make him pull back from supporting the Knights or risk losing his magic defence.

My magic phase saw Wyssan's Wildform cast on the Knights of the Realm, and not a lot else. In the shooting phase however, the Trebuchet found it's mark, splattering two Chaos Knights (including the Champion). The Peasants began what would be a dismal game of shooting for them by killing nothing.


Turn 2
In short, my plans worked. The Warriors turned to face the biggest of the three threats facing them, the Knights Errant, and the Warshrine turned to face the Pegasus Knights to (bonus!). The Chosen and Sorcerers did indeed back off from my Knights. This left the Chaos Knights unsupported, save for a small unit of Marauder Horse (the Chariot was with the Chosen), and the refused the charge across the fence. However, the Marauder Horse were now threatening my Trebuchet.

Again, despite rolling high, Lee's magic phase failed to ignite. This was mainly because by retreating his Sorcerers were now out of range of everything bar the Knights of the Realm and the combination of heavy armour and a ward save boosted by the Damsel in the unit meant that the barrage of spells killed a only single Knight.

With a target in front of them, the Knights Errant couldn't refuse it and impetuously charged headlong into the Chaos Warriors. Needless to say, the Grail Reliquae didn't join them, but maintained position to take their turn in operation 'Die Slowly', and the Pegasus Knight flew behind the Warshrine and Warriors. The Men-At-Arms moved up to the fence to give anybody attacking them a penalty to hit, and with the Chosen now out of range the Knights of the Realm reformed to threaten the Chaos Knights flank.

A magic and shooting barrage was opened up on the Marauder Horse in an attempt to protect the Trebuchet. However, only two were killed and the resulting panic test was passed (bugger!). In the combat phase heavy armour, lances and the Errantry Banner saw the Knights Errant draw with the Chaos Warriors, keeping the armoured block in place for another turn.


Turn 3
Scattered across the field, the Chaos army tried to respond to my manoeuvring. The Chaos Knights turned to face the greater threat of my Knights, risking leaving their rear exposed to the Men-at-Arms, which the Chariot threatened to counter-charge should they take the bait. The Warshrine turned to face the Pegasus Knights again and the Chosen and Sorcerers ran back towards the battle; however more significantly the remaining Marauders charged into the Trebuchet, threatening a disastrous panic test on my lines.

Another volley of spells bounced off the well protected Knights (the Banner of Discipline helped to resist the Fate of Bjuna) and the Knight Errant miraculously held on against the Chaos Warriors for a second round as they miraculously passed their break test. The Marauders predictably slaughtered the Trebuchet crew and pursued the survivor off the board. I prayed to the Lady as I rolled for the Men-at-Arms' panic test (failure would probably mean defeat)...they passed! I breathed again...

...and ordered the CHARGE! The Chaos Knights were caught between the Knights of the Realm and the Men-at-Arms. This would be the combat that decided the battle. The Pegasus Knights again moved to frustrate the Warshrine.

A strong magic phase saw buffs and hexes flying in an attempt to tip the big combat in my favour, however, dice were saved to send a thunderbolt to nuke the Chariot that threatened my flank. In combat, the Chaos Warriors finally broke the brave Knights Errant and pursued them (moving further from the main action). Over by the tower blades and lances were turned aside by armour and blessings as neither side made major inroads into each other. Tactical advantages gave me the win, but the Chaos Knights held. This was going to get messy.


Turn 4
The Chosen and Sorcerers continued to jog towards the Knights, hoping to tip the scales, and the Marauders returned with a similar intent. The Chaos Warriors turned round to see that the battle was being lost in their absence. However, it was clear that the Chaos Knights could still muscle their way to victory now that the Bretonnians lances had been spent. With nobody else to target the Chaos Sorcerers began to bombard the Peasants and Prophetess in the Chapel, killing several archers. The Death Sorcerer repaid the Fire Sorcerer in kind for earlier in battle by miscasting and wounding him.

All eyes were on the Knights. The Chaos Knights cut down gallant Bretonnians and again their foul black armour withstood Bretonnian steel. However, the much needed ranks of the Men-at-Arms were invaluable in beating and breaking the iron-clad horsemen. Both my units pursued and the Chaos Knights were caught and slaughtered.

Despite the defeat of the Chaos Knights, there was still work to do. My Knights and Men-at-Arms reformed to face the Chosen, ignoring the Marauders in their rear. The Pegasus Knights flew over to further threaten the compact Chaos unit. The Grail Reliquae, knowing it's duty moved to obstruct the Chaos Warriors. The Prophetess and Archers saw off the Marauder horse with a volley of magic missiles and arrows.

Turn 5
The Chaos Warriors charged the Reliquae as there was nothing else to do. The Chosen and Sorcerers tried to back off but were still in charge range. Magic dried up for Lee and the Eye was closed on the Warshrine, it seemed as if the gods had deserted their faithful. To cheer themselves up, the Chaos Warriors butchered a few Battle Pilgrims, who stubbornly passed their break test.

Once again horns blared and the Knights, Men-at-Arms and Pegasus Knights charged the Chosen. With no magical defence the Warshrine was hit by a thunderbolt from the Prophetess, however, the gods of Chaos returned to wreak their vengeance as the Prophetess and half the Peasant archers were dragged screaming into the warp. The Chaos Warriors destroyed the rest of the Reliquae but the Sorcerers and Chosen were butchered to a man and the victorious Bretonnians reformed to face what was left of the Chaos raiders.

Turn 6
Lee could do nothing but brace himself for an impact, which duly came, the Knights, Pegasus Knights and Men-at-Arms charged the damaged Warshrine and destroyed it. The battle was won.


Overall, I think I did well in this battle. There's no way that I could have won a head to head clash with Lee's army so by using my reserves to draw off the Warriors for what turned out to be the whole game, I disrupted his attack. This was furthered by forcing the Chosen to back off and using the Peasant's fence to deter the Knights. Despite playing defensively, I managed to seize the initiative and never really surrendered it.

I almost dropped the ball when the Marauders got through my lines to the Trebuchet, it was squeaky bum time with the panic tests, and had I not been able to blast the Chariot off the table, things might have turned out differently with the Knights' combat. I was also silly rolling for unnecessary spells (I didn't have to attack the Warshrine), and that cost me my Prophetess and made the final result much closer than it looked.

Just like Aneurin last week, I don't think Lee will fall for the same tricks again, I'll have to come up with something new when I face him again. I'm also tempted to drop the Crown of Command on the Damsel as I've not made use of it yet and the Knights having Leadership 9 (from the Banner of Discipline) and a re-roll from the BSB should be enough. I think I need a dispel scroll of some form (as the Channelling Staff is rubbish for defence when you need it) and the Silver Mirror would have been ideal for sniping one of the wounded Sorcerers.

All in all things are going well. Although it's probably due to the fact that I'm beginning to get to grips with the army and I'm playing people who've only played a handful of games. So, in order to continue my streak I'm playing Matt next week and he hasn't played any games of 8th edition. He is, however, bringing cannons...

Sunday 4 September 2011

A New Look...For A New Book?

WARNING!!! THIS POST CONTAINS REALLY BAD PHOTOS

At some point last year I made a promise to myself that I would not spend any more money on my Wood Elf army until they got a new army book, even though I've been finding them difficult to win with. My reasoning for this was twofold; firstly I'm fully inducted in the cult of Cheaphammer and I had a perfectly serviceable army. Secondly, I know in the pit of my stomach that if I spend money chasing a more effective army, any investment I made would be rendered irrelevant by the changes GW made to the Wood Elves - it's the law of new books: if it's good, it will get worse; if it's bad, it will get better; if it's new and expensive, it will be awesome.

Therefore, I've been struggling along with my army as it was, limping from battle to battle vainly hoping that GW would get round to the Wood Elves so that I can close the power gap. That was until Friday.

I dropped my army.

The major damages were to the cavalry - specifically the Wild Riders. Heads, weapons and bases went flying. I swore a bit. Well...a lot.

My initial reaction was to say sod it, put the Elves away and move on to the Bretonnians full time - kind of like I did with my Vampires (they only come out these days when I'm really bored of losing with the Wood Elves). However, I am at heart a Wood Elf player - it was the army I wanted as a kid. So I've decided to treat this as an opportunity to revisit, repair and improve my army and hopefully get this done before any new book appears, and work has already begun.

Here's how the Glade Guard looked previously:


They were painted about five years ago when I was just getting back into wargaming. As you can see, they're a bit shiny. This is because I used ink washes quite heavily and didn't get round to matt varnishing them. The colours are also a bit flat (the faces lack depth) and the bases are boring.

Therefore, I've begun with finally giving them a coat of matt varnish to remove the shine, and then add depth and definition with a simple coat of Devlan Mud wash. Some models may need a little highlighting too. I've also added a little static grass on the base (dead grass colours, to add to the autumn theme of the army). I may, later on add a few twigs and stones as well.

Here's how the Glade Guard look now:


I think that with just a little work, the models have been significantly improved. If and when a new book comes out along with new models, I'll be able to work on painting them to a higher standard and not have to worry about them not fitting in to the army.

Nothing too flashy or clever, but easy enough to do and with a definite impact means that I can feel positive about repairing and rebuilding broken models over the weeks/months ahead.

Here's a really bad comparison shot:

Friday 2 September 2011

The Thunder of Hooves!!!

I finally get it. I finally get the appeal of Bretonnians. This may sound odd from someone who's building an army of them, but I wasn't sure how playing a Bretonnian army felt until last night. I've always known that my Vampire Counts are like a choking fog that suffocates the enemy - it's never dynamic, they simply grind away until the opponent can't breathe. I know that my Wood Elves are like wasps, darting, moving and stinging - small bites rather than hammer blows. However, the Bretonnians were a bit of a mystery and in my previous games I've held back, unsure of how to act.

After last night, however, I get it. I understand the thrill of piling a lance into a stationary target or the sheer exhilaration of thrusting fully armoured knights down the throat of units that lack the strength to hurt them. It's a very different feeling to my previous armies...and I loved it!

I won. You guessed that didn't you?

The game was 1600 points campaign game against Aneurin's exquisite High Elf army (see National Elf Service in the links). The scenario was a meeting engagement and the terrain role had brought up both an Encampment of Destruction and a Settlement of Order so we had the diagonal between the two. I won the roll and elected to set up in the Encampment of Destruction, which had a Tower of Blood (more on that later).

My army was as follows:

Level 4 Prophetess of the Lady (Lore of the Heavens) - General
Mounted Level 1 Damsel of the Lady (Lore of Beasts)
Mounted Paladin - Army Standard Bearer
8 Knights of the Realm - Full Command
30 Men at Arms - Full Command
5 Knights Errant - Full Command
19 Peasant Archers - Standard, Musician and Braziers
3 Pegasus Knights - Musician
Grail Reliquae and 6 Battle Pilgrims
Field Trebuchet

Anuerin fielded a compact force:

Mounted Level 4 Archmage (Lore of Shadow) - General
Mounted Elf Prince - Army Standard Bearer
21 Lothern Sea Guard - Full Command
10 High Elf Archers
12 Swordmasters of Hoeth - Full Command
Great Eagle

We both rolled for reserves and I ended up with both the Men at Arms and the Knights of the Realm off the table. Aneurin lost his Lothern Sea Guard and crucially his Army Standard Bearer.

In terms of deployment, I set up in the corner with the Peasant's sharpened stakes extending the barricades surrounding the Encampment and the Knights Errant (packed with characters) covering the flank. The Grail Reliquae was positioned in front of the Knights to stop them from doing anything impetuous. The Pegasus Knights were positioned far on the other flank in an attempt to either flank Aneurin or draw one of his units away from where the main fight was likely to be.


Aneurin deployed quite wide (which is difficult to do with such a small army). His Silver Helms (supported by his Eagle) were staring down the throat of my defensive bunker, intent on bursting it apart. The Archers were in the centre and the Swordmasters were way out on his far flank facing the Pegasus Knights, who moved back towards my main force with their vanguard move, leaving the Swordmaster stuck out on their own.

Turn 1
My army prayed to get their blessing so Aneurin took the first turn. The Silver Helms advanced, keeping the woods between them and my Peasant Bowmen. The Lothern Seaguard arrived and moved to support the Archers in the centre, who failed to hit anthing with their shots. the Swordmasters began to scurry towards where the real action was. The most eventful moment of the turn was the Arch Mage's successful casting of Pit of Shades. The big template came out, hovered over my densely packed forces and then...scattered off the table. Phew!

In my turn I advanced the Grail Reliquae in their now trademarked 'procession' formation towards the Silver Helms to redirect any thunderous charges they had planned. The Knights of the Realm came on behind the lines and the Damsel and BSB moved to join this far more sensible and less hot-headed unit. The Knights Errant, aware that the Silver Helms were perhaps a bit tough for them, galloped off to bully some Archers. The Men at Arms moved into the Encampment, warily conscious that they were being put in the frame for dealing with the Swordmasters as the Pegasus Knight flew past them. The Peasants and the Trebuchet both disgraced themselves by failing to even hit the Silver Helms - and in fact proceeded to miss everything for the entire game (I won't mention my shooting phase again; just assume that they are missing). Again the highlight was the magic phses where Urannon's Thunderbolt from my Prophetess fried three Silver Helms.

Turn 2
This is where things began to go wrong for Aneurin. You may have picked up that I didn't mention his BSB last turn. That's because he forgot to bring it on. You'll also notice that I don't mention it during this turn either and consider what effect this has on events later in the turn.

The Silver Helms charged the Grail Reliquae who held. The Archers and Seaguard failed to shoot the Pegasus Knights and the Swordmasters carried on jogging toward the Encampment. The Archmage failed to cast Occam's Mindrazor on the Silver Helms. This was again quite crucial although it didn't seem it at the time; they were only facing peasants after all. During combat, the Silver Helms learn't all about the Grail Reliquae's special rules as the Blessing of the Lady meant that they only killed three Battle Pilgrims and the fact that it was Stubborn and in range of my BSB meant that the Silver Helms were stuck with Knights in front of them and Pegasus Knight to the side of them...


Chaaaaaarrrrggggggeeee!!! The Knights of the Realm smashed into the corner of the Silver Helms and the Pegasus Knights smacked into their flank. The Men at Arms shuffled about and the Knights Errant continued to gallop towards the Archers. The magic phase saw Iceshard Blizzard cast on the Silver Helms reducing their chances of hitting. In combat, the lance formation allowed my BSB and three knights to fight, even though they were stuck on the corner, and they killed two Silver Helms. The Pegasus Knights also killed another. The Elves managed to clobber another three Battle Pilgrims but the combat resolution (BSB, charging, ranks, flank) was massively in my favour. Had Occam's Mindrazor been cast, things might have been different. Had the BSB been around with his +D6 to combat resolution banner things almost certainly been different. However, as it was, the Sliver Helms broke and were run down by the Pegasus Knights, who to add injury to insult, crashed into the Eagle.


Turn 3
Things were looking bleak for the High Elves. Their main combat unit was gone, their only spellcaster was gone and the Knights Errant were about to reach their lines. However, all was not lost! The Knights Errant were in the open facing 30 bows, the Swordmasters were in the Encampment and an Elf with a flag finally decided to show his face. A bit confused about where his unit was, the Prince trotted up behind the Seaguard and watch them and the Archers fail to wound a single Knight Errant (there was a pinging noise).

Tally ho! The Knights Errant charged the Archers, who fled (they proceeded to fail all their rally tests over subsequent turns and fled off the board), so the Knights redirected into the Seaguard. This time their arrows brought down a young Knight. The rest of my army made it's way around the wood on the left and the Peasant Bowmen did the unthinkable and left their defensive stakes behind. In the magic phase the Knights were aided by Harmonic Convergence cast on them and Iceshard Blizzard cast on the Seaguard. This combination of factors (along with lots of armour) meant that the Lothern Seaguard were unable to kill any Knights, whilst the Knights (and more specifically their horses) did kill a few Elves. Two more failed Leadership tests later and the Lothern Seaguard were run down by the Knights Errant.

Turn 4
For Aneurin, things had gone from bad, skipped worse, and straight to blood awful. He was now in that 'sod it' phase we're all familiar with and his BSB charged the flank of the Knights Errant, and broke them! The Swordmasters finally moved into a positon where they would get to charge the Men at Arms next turn.

My main forces continued their slog around the wood (which seemed to be bigger than earlier) to get themselves in a position the threaten the High Elf Prince. The Men at Arms turned to face the Swordmasters and the Prophetess helped matters by casting Harmonic Convergence and Iceshard Blizzard. Urannon's Thunderbolt also reduced the once proud (if somewhat tardy) High Elf Prince to something resembling a baked potato.


Turn 5
With nothing else left, the Swordmasters charged the Men at Arms, slicing and dicing eight of them - it would have been more were it not for them having been granted the Blessing by the Prayer icon of Quenelles earlier in the game. However, Harmonic Convergence and hatred from the Tower of Blood gave the Men at Arms the oomph they needed to kill six Swordmasters in return and so the combat ended as a draw.

In my turn, my entire army moved up to squash the Swrodmasters should they break through the Men at Arms, and once again the Prophetess hexed and buffed to her heart's content. Again the Swordmasters chopped up Men at Arms with ease, but the peasants' halberds took down five of the remaining six. He broke and ran, and the game was over.

Summary
All in all it's difficult to draw conclusions from this game as Aneurin's luck was out. When he had a wizard, the power in his magi phase was low and his didn't pass a single leadership roll all game. He didn't help himself by forgetting his BSB (which would have made a different with the Silver Helms) and I also think that he spread himself to thinly and so I was able to deal with his units one at a time.

However, I have worked out the following:
1) The Lore of Heavens is great! Powerful magic missiles combined with useful augments and hexes makes this lore good no matter what's happening. It's particularly good for levelling the field between enemy elites and my frankly average troops.

2) The Grail Reliquae is a fantastic anvil. Admittedly, Aneurin won't fall for that particular trap again, but with the additional Battle Pilgrims I'm painting this month, this is great unit for holding an enemy in place for my Knights to charge.

3) Knights have a lot of armour. I shouldn't be afraid for them, they aren't Wild Riders and can shrug off most light shooting. I guess that this won't be true against a certain Dwarf gunline that's being constructed, but we'll worry about that when it happens. However, I'm already thinking of using the remaining Knights I've got to add to the Errant unit rather than create another small unit of Questing Knights.

4) Charging is fun. I realised that I'd not redirected a charge in 8th edition until yesterday (probably because nobody's scared of Wood Elves) and it felt like I was finally using the army the way that it's meant to be used. I need to learn the ways to ensure that I get the charge.

An enjoyable game, with good looking armies on nice terrain. Yes, I benefited from Aneurin's bad luck but everyone deserves a game like that now and again. I'll be back to being slaughtered soon enough; Captain Chaos is angling for a game.