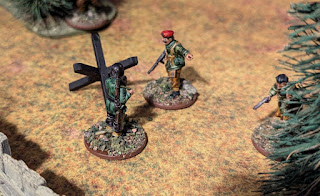
Over the last couple of weeks, Matt and I have been stealthily evading the rest of our gaming group and enacting our secret plan to try out his relatively new acquisition, 02 Hundred Hours from Grey For Now Games.
The game focuses on covert operations during WW2, with SAS teams launching raids on unsuspecting German targets.
The starter set comes with rules, cards, dice tokens and a good chunk of miniatures (from Wargames Atlantic), giving you everything you need to play, except for the MASSIVE amounts of terrain you need to not only make the games feel immersive, but also prevent the SAS getting spotted and gunned down in short order (something we discovered in the first game).
The rulebook contains a series of scenarios which seem to introduce rules slowly, which is handy because the game is a bit fiddly and it's easy to make mistakes when you are learning.
Activation is decided by drawing tokens out of a bag, special dice are used for skill checks and different types of cards can be used to mix things up.
Over the course of three evening, we've played through the first three scenarios and learned a fair amount along the way.
Mission 1 - Hunted
In our first game, Matt made pretty good headway initially, especially as the random movement brought about by the roving patrols rules meant that the Germans spent the early turns marching around in circles and clearly shouting at each other to reveal their locations.
However, once the British were spotted, the lack of cover meant that weight of fire won the day as the Germans managed to take out three of the five SAS men.
We did actually play this again taking on different roles, but the outcome was pretty similar.
Mission 2 - Butcher and Bolt
This was a close game in which victory was ultimately claimed by the Germans after a crack shot by a late arriving sentry, taking down the British Sergeant just before he could kill again.
Mission 3 - Sabotage
Ultimately, despite card-based shenanigans, the SAS were able to destroy the radar station, but only secured a minor victory as they failed in their secondary objective to leave the table with more than half their squad intact.
All in all I think we've both enjoyed this game and we are starting to appreciate the tactical nuances as we get to grips with the rules. For example, due to marginally different stats, Feldgendarmes make better reserves than Sentries, who make better...well...erm...sentries.
We are still making mistakes, but that's not really due to complexity of the rules, but more to do with the fact that lots of the mechanics are fairly similar, but not the same.
If Matt hadn't already got everything we need to play, I'd probably be considering picking this up. If you are remotely interested in WW2 gaming but are daunted by building a full army, you should probably have a closer look.


Great report! I bought it to this big time and then left it sitting around. Now painting up SAS for a raid in the desert but haven't actually played a game so great to read your pointers here.
ReplyDeleteIt's a good game, but I think it will shine when we both know what we are doing.
DeleteI was interested in the game. I have some of the SAS they are great little kits. I love all the weapon options on the sprues!
ReplyDeleteI've no intention of buying anything for the game. I'll let Matt do that. :)
DeleteLooks an interesting game
ReplyDeleteIt is. It's definitely a different sort of WW2 game.
DeleteI have this but done nothing but build all the miniatures and got a load of resistance minis as well - your right you need LOADS of terrain and scenery and the expense of this has left this game languishing at the back of the queue.
ReplyDeleteI think you could get away with padding the board out with a whole bunch of lichen as undergrowth and bushes. However, several scenarios called for some sort of encampment. It helps that we've amassed terrain that works for Bolt Action.
Delete