Thursday, 27 October 2011

Two Out Of Three Ain't Bad

Last Thursday saw me managing to fit in three, yes that's three, games of Saga in one evening. All of this makes for excellent practice for the upcoming tournament, however, rather than my usual exhaustive account, I'll go for something a bit briefer with a run down of the lessons learned in each game.

Game 1: Vikings (me) vs Vikings (Andrew) - The Challenge

This game saw me using my Gauls as Vikings for the first time, as that's what I'll be using for the tournament. I took 4 Berserkers, 12 Hirdmen and 16 Bondi; I kept the Hirdmen in one mahoosive unit and split the Bondi into two units of 8. Andrew took 12 Hirdmen in two units of 6, 16 Bondi in two units of 8 and 12 Levy in two units of 6. As you can our Warlords faced off in the middle whilst I bunched up in a rush to support mine, whilst Andrew split his forces in an attempt to effect a pincer movement (all a bit tactical for the Dark Ages?).

I raced forward to support my Warlord and launched my Berserkers into one of Andrew's Hirdmen units. Using Frigg to remove fatigue and Ullr to allow me to reroll missed hits, the Hirdmen were wiped out to a man. As expected, packing only Armour 3 the Berserkers were also cut down. This was going to be bloody.

Andrews pincers closed in (missing a claw) and his remaining Hirdmen rushed over to interpose themselves between my big Hirdmen unit and Andrew's Warlord. I took the bait and again lauched a massive hammer blow. 12 Hirdmen and my Warlord (that's 29 attacks!) smashed into the opposing shieldwall, again using Frigg to remove fatigue. In desperation Andrew used Valhalla to sacrifice a couple of his men for increased attacks and cut down four of my trusty warriors. However, it wasn't enough as a storm of swords hacked the four remaining Hirdmen to pieces. This was all going rather swimmingly...

Next stop, the Warlord. My 8 Hirdmen and Warlord charged into the opposing chieftain and a number of things happened. Firstly, I forgot to use Thor to gain an extra round of combat. Secondly it turns out that I was playing the wrong game and Andrews warband was led by a Space Marine in Terminator Armour. Not only could I not hurt him (21 attack dice!), but his Power Axe also cut down four of them! Force to disengage, in desperation I tried again with just the four Hirdmen - surely it couldn't happen again...

It did. The were killed to a man.

There had been sporadic combats elsewhere and I was no left with two units of four Bondi and my Warlord to face a Warlord, 12 Levy and 14 Bondi. I decided to go down fighting, and although the Levy were left alone, my Bondi died heroically defending their Chieftain. It wasn't enough and eventually my Warlord stood alone...and was cut down.

Lessons Learned:
  1. Berserkers are great when used like a nuclear missile. With armour 3 you can expect them to die, so you might as well point them at something big and ramp up the attacks as much as you can. Make sure that they take down more than their points, but protect them from archers.
  2. Frigg and Njord are golden skills for allowing you to either launch long range attacks or make repeated attacks on the enemy. Viking need to get stuck in.
  3. Even though the goal of the Challenge is to kill the enemy Warlord, they are so tough that it might be worth focussing on the chaff and winning on points. I had the game by the throat, but the Warlord's ability to shrug off a lot of damage cost me my Hirdmen and the game.
  4. Splitting Levy units seems to not be a good idea. As Levy don't generate activation dice Andrew ended up never really being able to activate both units, so he wasn't able to bring his archery to bear in enough strength to have an effect.
Game 2: Welsh (me) vs Vikings (Kelly) - Clash of Warlords

Given that Saga plays quite quickly, I set up for a 4 point game, this time against Kelly, who'd brought Vikings. For a bit of a change I decided to use my Gauls as Welsh this time. As well as my Warlord I had 8 Teulu, and 2 units of 8 Priodaur. Kelly fielded his Warlord, 3 units of 4 Hirdmen and a unit of 8 Bondi.

Aware of how fast and hard the Vikings could hit, I set up as far back as possible. I was hoping to whittle the Vikings down as they advanced and on the second turn I was pleased when I rolled enough dice to use Taunt and the Rising Out to call the Bondi forwards and then have all my Priodaur launch their javelins at them at once.

To my horror, not a a single Viking fell. They were now in strike range and I thought I knew what was coming.

When Kelly placed his Saga dice, I noticed that he used them all on combat abilities and not activations. This gave me a clue to his intentions and when he activated his Warlord and the Bondi using the 'With Me!' ability, I used Holy Ground to reduce the Bondi's movement. The fell short on their attack and the Warlord was suddenly isolated. My Priodaur excelled themselves and cut the Viking Chieftain down.

First blood to me. Game over!

Lessons Learned:
  1. To be fair to Kelly, he's new to the game and when I read out the scenario rules, he missed the bit about the Warlord's death being the end of the game and so was more reckless than he would have been. However, it does underline the importance of keeping the scenario rules in mind.
  2. Don't throw all your dice at one cunning plan; keep a contingency. Twice in two games a big cunning plan (this time Taunt and Rising Out) had failed to come off and I'd been left horribly exposed. Had Kelly's Warlord not committed suicide, I would have been in trouble.
Game 3: Welsh (me) vs Normans (Tom) - Clash of Warlords

Given the sudden termination of my previous game, I had time for another one. This time against Tom's all-conquering Normans. He's been riding all over folks' warbands for a while and he approached this game with elan and confidence. However...I had a plan...

I kept the same set up as the previous game. Tom had his Warlord, 2 units of 6 Mounted Knights and 8 Sergeants armed with Crossbows. He massed his Knights on the flank and put his Crossbows in the great hall for protection. I spread out. I kept all of my units out of range of his Crossbows and all of them were in or behind terrain. I couldn't help it, but an evil chuckle escaped my lips as we began.

I got first turn and immediately used Taunt to bring one of his Knights units charging 12 inches forwards to the edge of a field. The Priodaur facing them launched their javelins and used the Deadly Strike to bring down one of the Knights.

Knowing that I had Ambush ready to protect the Priodaur in the field, Tom launched his knights at the Priodaur in the centre. Norman Knights hit really hard on the charge, especially when they hit with Terrified to give the enemy fatigue before you start. However, they Normans were also fatigued so I used the dice to improve my armour and halved my dice to increase my defence. The Welsh line held as only four warriors were killed and another Knight was brought down.

Tom had now put his fatigued Knights between two units of Welsh and a volley of javelins, again supported by the Deadly Strike finished them off. 6 Knights killed for the loss of only 4 Priodaur, not bad.

In the previous turn, Tom had used all his dice to get the exposed unit of Knights to attack and so the rest of his units hadn't moved. Realising that I had no intention of coming to him, Tom brought his Crossbows out of the house and launched another sweeping attack with his Knights at my Priodaur in the field (Tom had no worries about gaining fatigue due to such long charges). The Welsh trampled, four of them were killed and the rest were pushed back across the field.

However, the Knights were once again between two units of Priodaur and I again launched a Deadly Strike and used fatigue to reduce the Norman armour. Three Knights fell.

Realising that he was running out of Knights and I still had an untouched unit of Teulu in reserve, Tom got really aggressive and repeated use of the Activation Pool ability gained him the maximum number of dice. His remaining Knight crushed the Priodaur in the field, the Crossbows shot down a couple of the Priodaur in the centre and the Warlord rode down the remaining two. Finally he tried to move the Knights up to support the Warlord (who was looking vulnerable). I'd been waiting for this and finally played the Holy Ground that I'd been holding back. The Norman Knights pulled up short of their lord and could only watch as the Teulu rose up out of the long grass to surround him.

A cry of 'With me, boyo!' saw my Warlord and his Hearthguard launch themselves at the Norman Baron. I already had 29 attack dice, however given my experiences against Andrew's Vikings, I thought I'd better play it safe and used Strength Lies in Numbers to add another 8. Needless to say, the Norman Warlord was dragged from his horse, chopped into small strips and sprinkled with some cheese onto a slice of toast.

Lessons Learned:

  1. Normans hit hard and fast. However, they can over stretch themselves and be isolated. Also, check ranges to make sure that they have to gain fatigue to attack you.
  2. The Welsh are brilliant in terrain - they are protected from shooting, the enemy is slowed and several abilities enable you to use the terrain to your advantage.

Sunday, 16 October 2011

A Feast For Crows

This week saw me play my first game of Saga, the new Dark Age skirmish game from Gripping Beast. We played a scenario from the rule book called 'A Feast for Crows' and this is a four player mash up in which the goal is to simply kill, kill, kill! Due to the fact that my Vikings aren't finished yet, I fielded the Gaul Warband from my Carthaginian army as Welsh (they're equipped with javelins so that it seemed sensible). The Welsh are very much a skirmish, hit-and-run force so I would be trying to keep the others at arm's length.

Following the scenario rules, we each deployed our 4 point warbands in a corner of the table. Going clockwise from me there was Mal with his Anglo-Danes (a tough nut to crack), Trev with more Anglo-Danes (not that he worried me, he was miles away) and to my right, my major concern, Andrew and his Vikings (which like to get stuck in).


I figured that I would have a better time of it against Mal's Anglo-Danes because their strength is in defence, I thought that I would be able to pepper them with javelins before going in for the kill. So I headed of to my left - conveniently this also took me away from the Viking horde. Mal saw me as the closest target and so came directly at me.

Meanwhile, both Trev and Andy decided to ignore each other and trek down the length of the board to get to Mal and I. I think that they figured that they'd have a better time of it if they let us beat the snot out of each other and then they could mop up the pieces. In short...they were right.

The Anglo-Danes came directly at me, having no bows they needed to close the distance between us before my javelins could significantly weaken them. We engaged in a cagey battle where I backed off and would use Taunting to pull his units out of position, then Holy Ground to stop them reaching me, and finally The Deadly Strike to increase my javelins' damage potential. In reply, Mal used Intimidation to prevent my units activating and Shieldwall to protect his warriors.


I got my positioning wrong at one point and lost a unit of Teleu to his Huscarls and Priodaur unit was severely mauled by Ceorls. The Welsh really struggle to compete in close combat with the other factions. However, my continuous rain of javelins finally told and I finished off his big unit of Huscarls with a charge by my Warlord and second unit of Teleu. Left with only his Warlord and a unit of four Huscarls, Mal withdrew and headed for the cover of some trees.

I'd won my first encounter, however, I was left with my Warlord, 4 Teleu, a unit of 8 Priodaur and a unit of 4 Priodaur. During my clash with Mal, Andrew's Vikings had been slogging towards me and they were almost in strike range. I decided to back off and shoot again as I was outnumbered and had nothing that would stand up to his big unit of 8 Hirdmen.


However, it soon became apparent that this tactic isn't as effective against Vikings as their Frigg and Njord abilities meant that the Hirdmen could charge double range and not gain fatigue. I realised at this point that the Hit and Run ability would be really good for me as it would mean that I could put even more distance between us when he wasn't expecting it - however I wasn't rolling any sixes and so this option was denied me. The Hirdmen ate a unit a turn and although I had managed to whittle them down to half strength, they eventually caught up with my Warlord and my game was over.

In the meantime, Mal had found that running to cover hadn't brought him the safety he'd thought it would. Although he'd escaped me, he'd run closer to Trev's Anglo-Dane warband which descended on him like hounds after a fox. Although he put up a good fight, it was five against twenty-five and his Warlord died alone amidst the trees.


Mal and I headed to the bar whilst Trev and Andrew finally decided to get stuck into each other. The Anglo-Danes had taken more damage although the Vikings were spread out. Also, and I think this was crucial, I'd taken a lot of the sting out of the big Hirdman unit.

Trev headed for Andrew's Bondi, looking to destroy them quickly before they could join up with the Warlord. Predictably this brought the Viking Warlord scurrying back. In an attempt to weaken the Andlo-Danes' defence, the Bondi units hurled themselves repeatedly at the the Shieldwall. The Thor, Ullr and Ragnarok abilities saw the Bondi remove one of the Huscarl units but were badly mauled in return as the Anglo-Dane's exploited fatigue and their Dane-Axes.

However, in all this blood, the Anglo-Dane Warlord was suddenly alone with the Viking Warlord and his Hirdmen bearing down on them. They rushed into combat, sure of victory, only to find that a couple of Huscarl were close enough to aid their Warlord. The Vikings failed to hurt the Warlord, whose Dane-Axe cleaved through two of them and then The Push finished off the others. The Viking Warlord backed off, stunned at the ferocious defence his counterpart had put up. In return the Anglo-Danes charged the fatigued Viking Chieftain and cut him down to take full possession of the bloody ground.

My first impression of Saga is that it's a great game. It's easy to pick up, has loads of tactical options and really subtle differences between what appear to be similar factions. Due to the fact that you can always use your Saga dice for some abilities, a bad dice roll is not as crippling as it can be in other games. The game plays fast a furious and expletives fill the air as your opponent pulls off a combination of abilities that completely neutralise your carefully worked out strategy.

I don't really have any gripes at all (which is unusual for me) as the game delivers exactly what it promises. Straight fights could get dull in time, but the game caters for that by providing a range of scenarios to change the dynamics and goals of the game.

The Feast for Crows scenario has a little glitch which we spotted half way through. The way the turn order is determined means that it's always more effective to attack the person to your left as you'll usually get to go before them and so will always have the initiative. However, multi-player games are likely to be rare enough for this not to be a severe problem, and it would be easy to fix it.

This game is great fun, and I'd highly recommend it. What's more, with a 4 point warband being as few as 17 models, it has a low buy in cost and gets two Cheaphammer thumbs up!

Tuesday, 11 October 2011

Vive le meatshield!

Another day, another battle. This time against Lee's growing Chaos horde, which has sprouted a mutant appendage which isn't encased head to foot in armour, in the form of a unit of Chaos Marauders. His full army consisted of: Level 3 Sorcerer (Lore of Death), Level 2 Sorcerer (Nurgle), Exalted Champion on foot, 9 Chaos Knights, 18 Chaos Warriors, 15 Marauders, 5 Marauder Horse, Warshrine.

We'd upped the points to 1750 so my list had become: Level 4 Prophetess (Heavens), Level 1 Damsel (Beasts), BSB, Paladin on Foot, 8 Knights of the Realm, 5 Knights Errant, 3 Pegasus Knights, 20 Peasant Bowmen, 30 Men at Arms, Grail Reliquae and 18 Battle Pilgrims, Trebuchet.

The scenario was the Watchtower (the first time I'd played this) and I wasn't looking forward to the prospect of trying to shift Chaos Warriors from the tower with my weedy peasant units. However, to my relief Lee garrisoned the tower with his Marauders. Somewhat less positively, the presence of a marsh also saw both forces deploy on one side of the tower and so I was not looking forward to advancing into the face of a meatgrinder.


I prayed, as always, and Lee advanced fast as his metal legs could carry him. The warshrine added even more armour to the Warriors and the Marauder Horse were witheringly efficient in killing a Pegasus Knight and panicking the others, great start! In my turn I managed to rally the Pegasus Knights, advance the Knights Errant on the flank and move the infantry towards the tower. In answer to the scattering of the Pegasus Knights, the Peasant Bowmen peppered the Marauder Horse with arrows and brought down three. They didn't run and I was still facing an advancing wall of steel.

Then something strange happened. Lee declared two long charges with his Warriors at the Grail Reliquae and his Knights at my Knights of the Realm. Admittedly, had he made the charges (either of them) it would have probably been game over, but both were at long range and both failed. This left his Chaos Knights still a long charge away and his Warriors with their flank hanging out in a direct charge line from my Knights. However, to dampen my ardour for glory the Death Sorcerer then successfully sniped my Damsel with Caress of Laniph.

Never one to refuse an invite I charged the Knights in to the open door of the Warriors flank. Assuming a case of rubber lances (which it's always best to do with Bretonnians), this would leave their flank wide open to the Chaos Knights, so I moved to block them with the Pegasus Knights and then charged the Marauder Horse with the Knight's Errant hoping to overrun into the Chaos Knights. Eager to get in on the act, the Paladin led the Men at Arms in an assault on the tower.


The Men at Arms, with the aid of the Paladin and the Prayer Icon of Quenelles (revealed earlier), withstood the Marauders' attacks and won the combat and broke the garrison to occupy the tower. I really started to get excited when the Knights of the Realm caused several wounds on the Warriors and won combat by a bucketload, however the party was cancelled when Lee rolled a double one for the break test. I was now in trouble (although it was helpful that he forgot to try to combat reform) and relying on the Knight's Errant. I was not to be disappointed as they smashed through the Marauder Horse and slammed into the Chaos Knights. I had the tower, the Chaos Knights were held in place and it was down to the Knights of the Realm to break the Chaos Warriors.

Lee charged the Warshrine into the flank of the Knights Errant (they looked done for) and rallied the Marauders. Another magic barrage (especially from Rot, Glorious Rot) saw several of my units whittled down and the Pegasus Knights destroyed. Combat saw the Knights Errant broken, and flee just too far from the Warshrine (taking it out of range of his Warriors). My BSB took down the Exalted Champion in one-on-one combat with style and panache and with the flanking still in place I won the combat and Lee couldn't repeat his leadership roll from the previous turn and the Warriors were broken and run down by my Knights. Things were looking good...although the Chaos Knights were staring ominously at the tower...

In my turn I did everything I could to protect the tower. I advance the Grail Reliquae towards the Chaos Knights, hoping to tempt them away from the tower, I marched the Knights of the Realm away from a flank charge by the Marauders, although kept the BSB close enough to lend aid to the Men at Arms and I moved the the Prophetess up to do the same should the Paladin die in combat. In my magic phase I was able to get Curse of the Midnight wind cast on the Chaos Knights and Harmonic Convergence on the Men at Arms. I'd done all I could, let the storm come. Oh...the Trebuchet blew itself up!


Even though they wouldn't be able to occupy the tower, the Chaos Knights were more than capable of butchering the occupants and so they ignored my Grail bait and barrelled straight into the tower. Magic was unimpressive and the Chaso Knights unleashed a bucket full of attacks and despite the magic aid, duly won combat (although the Paladin wounded the Sorcerer), however being stubborn in the tower and the nearby presence of the BSB saw the Chaos Knights repulsed.

Once again, a Chaos unit had it's flank wide open, this time to my Grail Reliquae. I did the maths in my head and worked out that to lose the combat Lee had to do five wounds from eight attacks and I had to kill nothing (which wasn't unlikely). Once again, to aid the combat I managed to get Iceshard Blizzard, Curse of the Midnight Wind and Harmonic Convergence cast on the combat. I had +5 CR before we began, would be re-rolling missed hits and and any 1's that I rolled. I also had the benefit of a 5+ ward save. Meanwhile the Chaos Knights would be at -1 to hit and -1 Leadership and be rerolling any 6's they rolled. Let battle commence...

The Sorcerer and Knight unleashed their barrage of attacks. After several rounds of rerolls they had scored five wounds (just enough to beat me). If I rolled averagely I would be okay. I rolled better than average and the blessing saves all of the wounds. In return I wasn't even able to chip the Knights armour, but it didn't matter, the combat was won and with a reduced leadership the roll of five wasn't enough and the Chaos Knights were broken. To add injury to insult the Grail Reliquae pursued and caught the lumbering Knights...run down by peasants, oh dear, oh dear...


With that the game was over. Not only did Lee only have his Marauders and Warshrine left, but also the game ended this turn on a six, which was duly rolled.

This was a game where things went well for me. Admittedly, at the end I passed a few more ward saves than expected, but working on averages, that combat should have gone my way anyway. I was able to capitalise on a couple of mistakes Lee made and seize the initiative. However, it's worth noting that in three combats, I didn't actually kill a single Chaos Knight - they still terrify me!

With regard to my own troops, the Lore of Heavens was again indispensable in evening up the odds in combat. I also feel that I used each unit well with the Knights Errant and Pegasus Knights serving well in a flanking/blocking capacity, the Knights of the Realm were a one shot tankbuster, and the infantry units did sterling service in a reserve role rather than as main line combat troops (although the Paladin seriously stiffened the resolve of my often lamentable Men at Arms. My missile arm disgraced itself again, but Chaos Warriors are never going to be their favourite targets...what I need are some nice juicy, skirt wearing High Elves...

Saturday, 8 October 2011

Bretonnia vs. The Empire...the Rematch!

Another valiant charge against a wall of guns, hoping to survive the hail of lead. That's what I expected when Matt challenged me to another game...and frankly that's what we got.

We'd moved up to 2000 points and so my army needed to change. My forces consisted of a Level 4 Prophetess (Heavens), a Level 2 Damsel (Beasts), a BSB, 2 units of 8 Knights of the Realm, 5 Knights Errant, 30 Men at Arms, 20 Peasant Archers, Grail Reliquae and 18 Battle Pilgrims, 3 Pegasus Knights and a Trebuchet. I'd borrowed some Knights from Matt and so was able to present more targets and hopefully split his fire (remember with horror what happened to my Knights last time).

Matt had changed his composition too. Having learned from last time that cannons hurt knights, blocks of infantry are difficult to shift and my Prophetess was a real threat his army list was: General of the Empire, a BSB, a Level 2 Wizard (Metal...boooo!), 2 Engineers, a Warrior Priest, 40 Halberdiers, 20 Halberdiers, 10 Handgunners, 8 Outriders, 10 Empire Knights, 2 Cannons, 1 Rocket Launcher, 1 Hellblaster Volley Gun. So, I could expect a barrage of lead as I advanced towards blocks of troops I'd struggle to break whilst Hochland Longrifles attempted to snipe my General. I'd better be quick.

The scenario was Meeting Engagement (again!) and I deployed first. I spread out to split Matt's fire and deployed as far forwards as I could. The Pegasus Knights were in reserve. Matt deployed a far back as he could whilst bringing his guns to bear. His Wizard, one of his units of Halberdiers and a Cannon (hooray!) were in reserve. he would get first turn because I was praying (there was no way I was facing cannons without the blessing), but at least there'd be on less cannon shooting.

The game began with Matt's reserves arriving and his troops opening fire. Despite a direct cannon hit on my BSB's unit of Knights, a double 1 to wound saw the projectile bounce off. Men-at-Arms and a couple of Knights fell to the barrage. The Prophetess was predictably targeted by snipers, but managed to shrug off a wound with the Opal Amulet. However, most damage was done by the sinister statue in the middle of my lines. In fact the statue would eventually break the Peasant Archers and severely weaken the Damsel's unit of Knights.

My troops rumbled forwards (although I failed to charge the Outriders) with the Knights Errant moving around the flank of his line. My Trebuchet answered his fire by dropping a rock straight on the head of Matt's General; killing him instantly! The Prophetess, who'd run to safety behind a building, managed to successfully cast Comet of Cassandora just behind Matt's line. Time for the second volley.

Matt advanced his smaller block of Halberds forwards with his Knights to threaten my central block of Knights. Matt did manage to cast Enchanted blades on his big block of Halberds, making them a very bad target for my other block of Knights. The Comet of Cassandora hit, pretty much wiped out the Handgunners, killed one of the Engineers and put wounds on two war machines. Another round of shooting saw relatively few casualties (another cannonball bounced off the Knights' armour) and it seemed like I was getting off a bit lightly, although the Knights in the centre did fail a panic check (the shame!) and run back towards the Statue. The highlight of the round (for me at least) was the Hellblaster exploding.

t was time to charge. The Knights Errant slipped behind the enemy lines to charge one of the cannons whilst the Men-at-Arms and the BSB's Knight unit both charged the Outriders (I know, my bravery knows no bounds!). I also remembered to bring my Pegasus Knights on. My magic consisted of a couple of buffs and hexes whilst my shooting now slipped into the realms of obscurity for the rest of the game. Predictably, both combats went my way; the cannon crew were wiped out (panicking a nearby engineer) and the remaining Outriders fled, not to return.

With his flanks and most of his shooting gone, Matt tried to secure his line against my roving Knights. The large unit of Halberdiers advanced to the corner of the Grail Chapel (clearly looking to force a fight with my Knights). The smaller unit of Halberds turned to face the Pegasus Knights whilst the Empire Knights refrained from charging the Grail Reliquae (which had been steadily advancing up the centre) because it would expose their flank to the, now rallied, Damsel's unit of Knights. Searing Doom was cast and ravaged the Pegasus Knights, leaving only one left.

The Knights Errant continued their heroic advance by charging the Rocket crew. The Grail Reliquae rushed into combat with the Empire Knights and the last Pegasus Knight supported them with a flank charge. The Men-at-Arms took possession of the Grail Chapel whilst the BSB's Knights reformed. I focused my magic phase on supporting the Grail Reliquae with Iceshard Blizzard and Harmonic Convergence. The Knights Errant won again (the heroes!) and, despite the last Pegasus Knight being killed, the Grail Reliquae not only beat the Empire Knights but broke them, ran them down and chased off the still fleeing Engineer into the bargain.

Things were looking bleak for Matt as he advanced his big block again to force events against my BSB's Knights. The smaller block moved to threaten the Grail Reliquae and the Searing Doom cooked three of the remaining four Knights Errant.

It was looking like I had events under control. I resisted charging Matt's augmented Halberds and the BSB wisely retreated, the Grail Reliquae turned to face the threat of the halberds and the Men-at-Arms popped out the other side of the Grail Chapel to threaten the last cannon. All very sensible. However, I then attempted to snatch defeat from the jaws of victory. I've never been able to resist a flank charge and so my poor, humiliated Knights in the centre who'd spent the entire game getting shot, panicked and zapped by a statue charged headlong into the side of the smaller block of Halberds, completely forgetting that they'd lost their blessing. They proceeded to completely fluff all of their attacks, saw two Knights hacked down by Halberds, broke and were then run down (along with the Damsel), panicking the Grail Reliquae (that they'd been trying to help) off the table. "Here Matt, have 600 points!"

With time ticking on, we decided this would be the last turn. Matt turned his poor ignored block around to avoid a rear charge from the Men-at-Arms. Magic was inconsequential and the Cannon's grapeshot failed to kill the last Knight Errant. In my turn the Knight Errant and Men-at-Arms continued to ignore the Halberds and charged the remaining Cannon, slaughtering it handily. However, the crew did manage to bring down the last Knight Errant so it averaged out that I'd not gained anything from this and had simply given Matt another 50 points. With that the game was over.

Totting up the points revealed that I'd won by two or three hundred points. However, if we'd played the final turn, Matt would almost certainly have broken my Men-at-Arms and would have had another go a using Searing Doom to cause havoc. It probably would have ended in a draw.

Although I'd played well early in the game, a silly decision had throw the result into doubt. Had I not charged the Damsel's Knights in, I would possibly have still lost the Grail Reliquae (although they might have won), but I wouldn't have lost the Damsel and Knight and so the victory would have been more secure. I also handed over points for the Knights Errant and the Pegasus Knights too easily and should probably just moved them safe. All of this isn't a problem in a friendly game, but if I ever find myself back at a tournament, I'll need to be a bit more savvy.

So, what have I learned:

1) Discretion is often the better part of valour. Just because I can charge, it doesn't mean I should.

2) Think before committing severely weakened units.

3) Block of troops can be ignored if there's lots of chaff to kill - Knights love to ride down chaff.

4) Present a gunline with as many targets as I can to split (and weaken) their fire.

5) The iPhone, although very clever, does not have as good a camera as my last phone.

Tuesday, 4 October 2011

October Progress Update 2...already!!!

Oh yes. Another unit done!

Admittedly this unit is only four Hirdmen, but that's a third of the force done in four days (and incidentally, the same amount of models as all of last month!). I'm now making good progress towards my target and I'm relatively happy with them.

This unit will be one of three Hirdmen units and rather than engage in base markers or 'themed' shield to distinguish them from my other units, this unit will be identified by the fact that all the members have masked helmets. The masks did make them quicker to paint as I didn't have to paint the eyes, mess them up, paint the eyes out, re-ink, then paint the eyes again as I usually do. All my Hirdmen wearing pretty much full length mail speeds things up a bit too.


As well as painting the Hirdmen, I also re-did the shields on several of the Bondi. There was something not quite right about them (I think it was my colour choices) so they needed changing. I had a bit of a brainwave and went to the Little Big Men website, and rather than buy some transfers, I've simply looked for appropriate colour schemes from their range and painted my shields like that. Admittedly, they don't look as good as transfers, but it does work out cheaper (which is justification in itself) and I'm able to work on improving my freehand painting. I'm still not sure about trying to shade the shields, or leaving the colours flat. I think I'll see how much time I have before the tournament before making that decision.

Next up is my unit of Berserkers! Mainly because they don't have shields.

Sunday, 2 October 2011

October Progress Update

The monotony has been broken and I'm enthused about painting again! Hurrah! A combination of taking a break from the Bretonnians, having the opportunity to paint models more individually and having set myself a challenging deadline has got me moving again and I've already 'finished' a unit of Viking Bondi, the first point of the six point Viking warband I need for the tournament in November.


I say 'finished', but you may have noticed that some of them are lacking weapons and the bases aren't done. I'm planning on doing all the bases at the same time once I've finished in order to get them consistent. As for the spears; after a bit of fiddling about I realised that the spears I have are not only too fat for the models' hands, but also they're a bit bendy. So, I need to get my hands on some brass spears to complete the unit.

The good news is that this unit is one of the two larger units I'm doing for the warband, and so represent a sizeable dint in the lead pile for this month. On top of that, if you look closely at the guy on the left, you'll see that my warband is packing the Viking version of Barry Gibb!

I've also bought and read the Saga rulebook. The rules are easy to comprehend but seem to have some real tactical depth for a skirmish game. I'm looking forward to getting my first game in a few weeks from now.

Friday, 30 September 2011

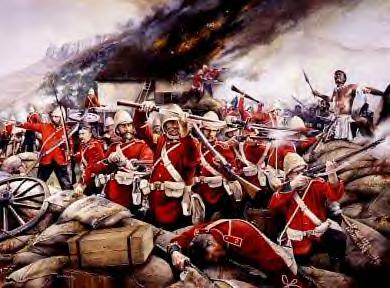
Zulus...fahsands of 'em!

I'm well chuffed. I got to play one of my 'I must wargame that' scenarios this week and it was a blast.


Let me explain. For reasons best know to myself there exists a list (in my head) of games, scenarios and settings that I've always wanted to play. The list includes the Battle of Wilson's Creek (ACW, I got to do that last year), the battle in the chapter 'The Uruk Hai' in Lord of the Rings, and a Punic Wars campaign (I ran one of those recently). Standing high up on the list is the actions of Isandlwana and Rorke's Drift, as detailed in the classic movies Zulu and Zulu Dawn. I've always been tempted to start collecting colonial miniatures, but I'm sure I wouldn't get enough use out of the to justify the expense and time investment it would take to collect appropriately sized forces.

Imagine my delight then, when the opportunity to play this scenario on a huge board with loads of painted models came up at our club. Kev, from 'Kev's Wargames Cabin' (see the link to the right), came to the club with a mahoosive collection of beautifully painted 15mm Zulus and Colonial British and a ready made scenario for a big multiplayer battle using rules adapted from Fire & Fury (a rules set I've not used before). I was in dreamland.

Rather than do my usual style of turn-by-turn battle report, due to the size and scope of the game I'm going to present this in five different sections to reflect the five different British players and their varying objectives and outcomes. I'll follow this with a brief review of Fire & Fury, as I experienced it. It's also worth noting that, by Kev's own admission, the scenario is a tribute to the movies and designed for good game-play rather than a faithful re-enactment of the historical action.

The Overview


The British Empire had declared war on the Zulus and determined to bring this war to a swift conclusion, Lord Chelmsford the commanding officer invaded Zululand. Making camp at Isandlwana, Chelmsford had divided his force, leaving Colonels Glynn and Pulleine at Isandlwana, whilst taking the best portion of his force to Ulundi, chasing rumours of Zulus. Meanwhile Colonel Wood's sizeable column was moving to meet up with Chelmsford whilst having received news of Zulu movements, Colonels Durnford and Rowlands advanced their native troops to reinforce the main column which they knew was marching into an ambush. Finally, Colonel Pearson had been left to garrison Rorke's Drift and hold it against enemy attack.

The Zulus, meanwhile, were moving about unseen, all that could be seen were dust clouds moving in the distance. Having all seen the films, we all knew that there were lots of them.

The British Commanders and their victory conditions were:

Trev - Lord Chelmsford - link up with Glynn and survive.
JP - Colonel Woods - link up with Glynn and survive.
Me - Colonel Durnford - link up with Glynn and survive.
Me (again) - Colonel Rowlands - either link up with Glynn and survive OR leave the table after being attacked.
Matt - Colonel Pearson - hold Rorke's Drift.
Brian - Colonel Glynn - survive AND collect water from the nearby watering hole.

We needed to achieve three of these objectives to win the game.

CHELMSFORD'S 'WAR'

Accompanied by the cream of the British army, the 'honourable' Lord Chelmsford was sure that he knew where the Zulus would be. He proceeded to send out scouts to explore the nearby dust clouds and discovered several small scouting parties of Zulus. He then proceeded to use the cream of the British army to destroy these small forces and performed in an entirely historical manner and completely failed to march to the sound of the guns (and the cries of "Trev, we're dying here!"). Chelmsford's command survived pretty much intact, but he failed to link up with Glynn. 1-0 to the Zulus.

MEN OF HARLECH STAND YE STEADY...

The British troops stationed at Rorke's Drift found themselves assailed on all sides by Zulus, witha large war party repeatedly assaulting the barricades, whilst scouts fired down into the fortified encampment from the hillsides. Despite taking losses the dismounted cavalry and artillery managed to sweep away the scouts in the hills, whilst the infantry held firm behind 'a few feet of mealy bags' and drove off wave after wave of fearsome Zulu's. With a less than appropriate Michael Caineism of "Your only supposed to blow the bloody doors off!" Matt held firm. We were all square at 1-1.

LOST IN THE WOODS

Colonel Woods' column never really got a chance to even move to aid Glynn as they were immediately ambushed by several large forces of Zulus. Despite forming a presentable line (and even using their wagons as makeshift barricades, Glynn's left flank was quickly overrun despite the presence of a gatling gun. The right made a brave stand but were assailed on all sides and eventually cut down to a man. A great cry of "ZULU!" went up, but that was just JP getting carried away. 2-1 to the Zulus.

"THOSE NATIVES ARE RUBBISH"

Having all been told how bad the Rowlands' Natal Native Contingent were, it was unsurprising that they were the unclaimed command before the battle. Being the commander closest to the N.N.C., I took charge of this force. Early on, a small force of Zulus appeared on their flank, and so thoroughly expecting to die quickly I formed lines and awaited the inevitable. To my, and the Zulu's surprise, the N.N.C. not only held firm but drove back the Zulus several times. Eventually the Zulus were driven off by a surprise charge by the dismounted Border Horse. Realising that I still near to the board edge and having been attacked I could achieve a victory point by simply naffing off, I did just that. We were back at 2-2.

THE CRIMSON PIRATE

The command I had chosen was Durnford's Horse, mainly because I wanted to play Burt Lancaster. So complete with dodgy Irish accent I mounted up and galloped to relieve Glynn. Somewhat surprisingly, my three small units of irregular cavalry made it to Isandlwana. this was largely due to most of the dust clouds in my vicinity turning out to be just that, dust clouds. Therefore the first action Durnford saw was against the Royal Impi at Isandlwana itself. Having completed part of my objective I'll maintain the suspense and let the action move to...

"HOLD THEM! HOLD THEM!"


Things began badly for Colonel Glynn when his water wagons upon arriving at the watering hole, discovered thousands of hidden Zulus in the form of the Royal Impi. Despite the escort getting back to warn the camp and some form of defensive lines being formed, things went from bad to worse when another Impi appeared on the other side of the camp. Worse became awful when it appeared that due to a dice (suspiciously offered by a Zulu player) that could roll nothing but ones, the British couldn't hit the side of an elephant and were unable to slow the Zulu advance.

Things then went from awful to terrible when Brian realised that both Chelmsford and Woods were either unable or unwilling to ride to his rescue. The situation briefly dropped back down the awful when Durnford arrived, although popped back up to terrible when it turned out that Durnford's men couldn't shoot either. Terrible finally became catastrophic when the Zulus overran the final line of defence (which consisted of two officers and a rocket team). With the loss of the Sikali Horse, the remains of Durnford's command was forced to beat a hasty retreat.

The final score...4-2.

The whole game was brilliant. The scenario was well constructed and the game was played in an excellent atmosphere. With the film theme playing in the background, lines from the films being quipped and the British generally getting slaughtered, a good time was had by all. A big thank you to Kev for going to the effort of getting all his stuff to the club.

A Quick Review of Fire & Fury

I've never played Fire & Fury before (although I did own the rules many years ago - part of the whole Wilson's Creek thing) and I have to say that I was pleasantly surprised. I remember being slightly mystified by rules mechanisms completely beyond the frame of reference of a Warhammer junkie.

However, with people who know the rules to show you the ropes the rules proved quick to pick up and relatively intuitive. I appreciate that Kev had adapted the rules slightly, but I enjoyed the command and control mechanisms and the way in which the Zulus attacked in waves felt entirely appropriate. I'd be keen to try Fire & Fury in its intended ACW setting and now that I have a loose understanding, picking up the rules should be fairly easy.

As well as the game rules, I also enjoyed the scenario rules as the separate objective made us (well, most of us) have to ride into danger and act in character. The best historical game I've played in quite some time.