Monday, 10 April 2017

The Battle of Vicksburg


As discussed in my last post, our American Civil War campaign had reached a crucial point, and potentially and decisive battle. Major General Ulysses S. Grant, leading the XIII and XV Corps of the Federal army, has brought the Army of the Mississippi, under Lieutenant General John C. Pemberton, to battle just south of Vicksburg. Steele's Division, of Sherman's XV Corps has advanced to engage the enemy, drawing them out of the defences surrounding Vicksburg, and now awaits reinforcement.

The Union army  has a slight advantage in numbers, but is arriving piecemeal to face a concentrated enemy. Victory for Grant would allow him to place Vicksburg under siege, and open the way to achieving his campaign objectives. Defeat would force the Union away from Vicksburg and possibly buy enough time for Confederate reinforcements to arrive from Jackson.


The terrain around Vicksburg has the fortified city in in north, by the Mississippi River. The railroad from Jackson heads off east, but no help is arriving from that direction. To the south, towards Warrenton, are the woods from which the Union army will slowly emerge.

With 6 Union Divisions facing off against 5 Confederate Divisions, both sides would have to break three enemy divisions to seal victory.


The Confederate forces are massed around Vicksburg: Forney's Division are in the city itself; Smith's Division facing off against the advancing Federals; Loring's Division are positioned along the railroad; and Stevenson's large division is holding the left, aware of the dangers of a Union flanking movement. 


Steele's Division, of Sherman's Corps, are the only Federal troops in the field and emerge cautiously from the woods to engage the enemy.


Federal reinforcements begin to arrive in the form of Smith's Division, of McClernand's Corps, threading their way along the road (yes, I know you can't see it, but it's there) towards the ford.


The Rebels also receive support from Bowen's Division, arriving from the west. However, they arrive in march column worryingly close to the enemy and take fire from Steele's artillery.


More of McClernand's Corps, Hovey and Carr's Divisions, arrive and split their forces. The artillery is sent along the road to support Steele, whilst the infantry break into skirmish formation and begin to thread their way through the woods, aiming to keep Stevenson from moving to where the battle is developing.


Tuttle's Division arrives on the western flank and engages Bowen, breaking one of his brigades with the shock of their arrival.


With two divisions apiece engaged, the battle is now fully engaged, but the Confederates seem unable to stem the Federal tide (a series of terrible rolls from Pete fails to inflict any damage on the Union line).


Meanwhile, in the east, Osterhaus's flanking force arrives, but finds Stevenson's Division ready for them. Not only are they unable to get around the Rebel flank, but they are heavily outnumbered and the rest of McClernand's Corps are still slowly picking their way through the woods (Matt was repeatedly failing orders tests for the divisions in the woods).


Taking full advantage of the Rebel inaccuracy, Tuttle advances into close range and breaks Bowen's Division with a powerful volley. (Union 1 - Confederacy 0)


With this, the Rebel flank was exposed. Smith's (Confederate) Division was now significantly outnumbered. To make matters worse Smith's (Union) Division finally reached the end of the woodland road, and the final Union reinforcements arrived from the West in the form of Blair's Division of Sherman's Corps. Thinks looked bleak for the defenders of Vicksburg.
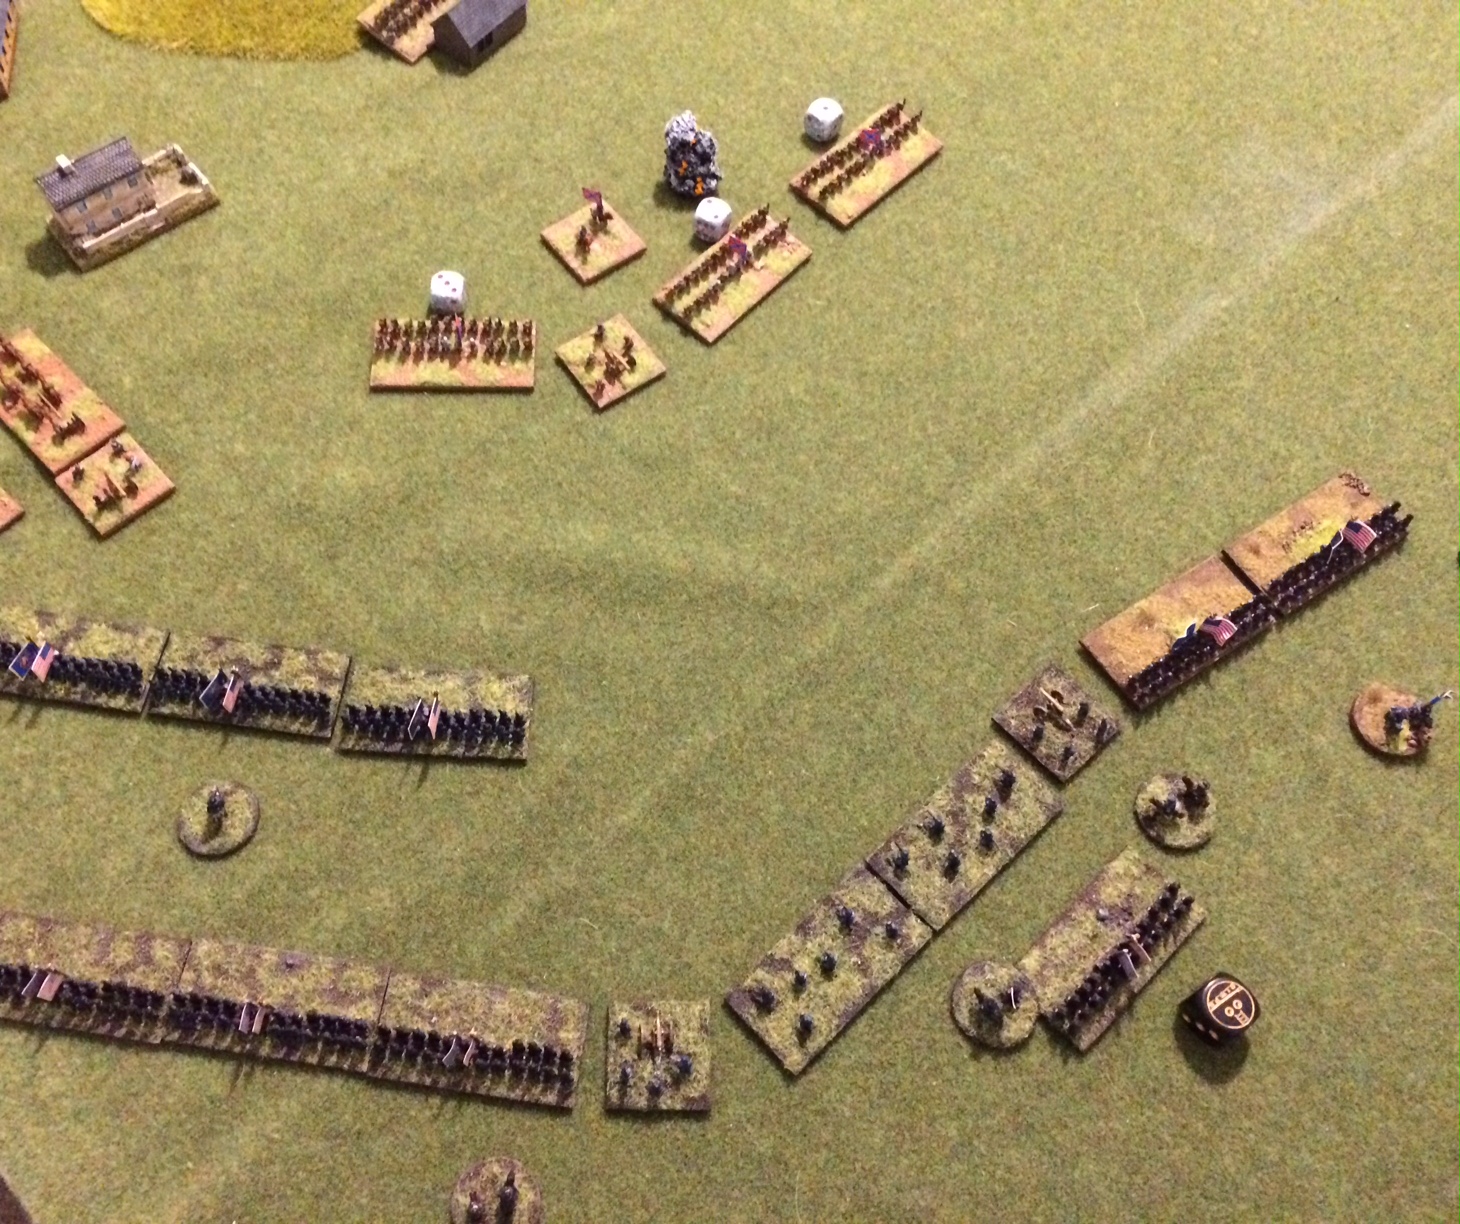

Major General William T. Sherman took full advantage, and began to pour fire into the exposed secessionists, hoping to completely turn the Rebel flank.


Despite the successes in the west, Osterhaus's Division finds itself completely outmatched by Stevenson, and begin a holding action designed simply to keep Stevenson's large division from moving to support the Rebel's collapsing right flank.


Smith (Confederate) holds his ground as Loring's Division (which so far had remained in reserve) moves up to stem the Federal advance. The artillery of Forney's Division also moves out of the fort in support. Worryingly accurate cannon fire allows the Confederates to inflict damage on Smith's (Union) Division, and disorders Tuttle's Division and stopping the flank being fully turned.


Stevenson's Division continued to inflict massive damage on Osterhaus's Division, but the beleaguered Federals hold on in grim defiance, despite their cavalry breaking.


However, any hope of respite is removed with the rest of McClernand's Corps lost in the woods, despite being joined by Grant himself.


With Tuttle's Division halted, Blair's Division is moved up to take over the assault at close range...


...breaking Smith's (Confederate) Division and completely collapsing the Rebel right flank. Only Forney's small division, occupying the city itself, stand between Sherman and victory. (Union 2 - Confederacy 0)


A new, hastily assembled line is put together amidst the wreckage of the Confederate right flank. Could Loring's fresh division invoke the spirit of Stonewall Jackson at Bull Run and rescue the Confederacy?


Hope comes for the secessionists as Osterhaus's Division is finally broken, potentially freeing up Stevenson. (Union 2 - Confederacy 1) 


Sherman masses his forces for what will hopefully be the final assault, whilst Tuttle's Division gets moving again and enters the outskirts of Vicksburg.


Loring's Division unleashes accurate fire which pushes Smith's (Union) Division close to breaking. It won't take much to make them go. Perhaps there's a chance that the tide could turn? 


Grant finally gets the divisions in the woods moving, just enough to keep Stevenson's Division torn between helping against Sherman and protecting their own flank, and potentially being able to quickly break the weaker divisions in skirmish formation.


The strong Confederate defensive position allows them to inflict damage across the lines of Union soldiers, threatening to break them in numerous places.


With his line wavering at various points, Sherman orders a general advance into Vicksburg to drive the Rebels out of their positions. Tuttle is repulsed from the fort, but Blair sweeps one of Forney's brigades away with some vicious hand to hand fighting.


Despite taking casualties, Loring's Divsion grimly holds on and manages to fianlly break Steele's Division, which has been engaged since the very beginning of the battle. With all of the Federal divisions on the right flank wavering, could the battered Rebels snatch victory from the jaws of defeat? (Union 2 - Confederacy 2)


Aware of the need to decisive, Sherman risks exposing the flank of Blair's Division to enfilading fire to inflict as much punishment on Loring's Division as he can.


At the same time, the bloody remnants of Tuttle's Division pout fire into the fort in the vain hope of somehow breakings Forney's artillery.


Despite the volume of fire they are subjected to, Loring's Division somehow holds their ground.


The desperate situation to the west finally causes Pemberton to order Stevenson's Division to ignore McClernand's Corps, who have finally emerged from the woods, and move as quickly as they can to engaged the battered Union forces on the right.


With the battle hanging in the balance, the Confederate resistance is enough to drive back Blair's Division, but not break them. The Union are still able to unleash devastating fire at Loring's Division...


And this time it's enough to break the stalwart Rebels. (Union 3 - Confederacy 2)


Battered and bruised, Sherman's command had managed to drive off three of the four Confederate divisions they had faced. Stevenson had numbers and was still relatively fresh, and Forney still, just about, held the centre of Vicksburg, however the eventual arrival of two fresh divisions under McClernand was enough to drive Stevenson away from Vicksburg and split the Army of the Mississippi in two. Victory belonged to Grant.


The campaign isn't over, but the Confederate army is in disarray. A handful of units remain to hold Vicksburg, whilst Stevenson's Division and Loring's artillery have been driven north. This has allowed Grant to begin the encirclement of Vicksburg and made it incredibly doubtful that Pemberton can do anything about it.

Meanwhile, over in the east, McPherson's scattered divisions are closing in on Jackson. Unless reinforcements arrive, the Rebels look unable to prevent the city's fall. However, should reinforcements arrive, McPherson's isolated units look ripe for being picked off and pushed back. All is not lost.

Overall, this was a brilliant game. The campaign rules gave us a really interesting scenario with genuine consequences to consider. The desperate, and sometimes foolhardy actions of the Confederates almost snatched victory, but ultimately have left their divisions unable to function (I'm going to suggest merging divisions which currently have less than three units, as otherwise, they are just too fragile in game). Had they succeeded, however, victory would almost certainly have won the campaign for Pete and Wes.

The key events for me were as follows:
  • The lamentable performance of Bowen's Division: being caught in march column, failing to inflict any damage on Tuttle's Division and then being driven off so quickly meant the Confederates were on the back foot almost immediately.
  • Diverting Stevenson's Division. Keeping the largest Rebel division away from the main fight for so long was crucial. Matt and I deliberately threw Osterhaus's Division at them for that putpose.
  • Piecemeal defence. The Confederates were perhaps a bit slow in bringing up their reserves, which allowed to combined weight of Sherman's Corps to engage a single division at a time. When they did manage to combine their defending units on the outskirts of Vicksburg, the battle was almost won.
  • The long march through the woods. Initially we thought that repeatedly failing orders checks on the divisions on the woods was a bad thing as it left Osterhaus unsupported. However, Stevenson's Division would have had the opportunity to break either Carr or Hovey, potentially winning them the game.
  • Blair's Division. Arriving late, Blair took over from Tuttle and broke Smith's Division, then charged in to drive Forney's troops out of their defences, and finally was instrumental in breaking Loring's Division. All without losing a single unit.

A great game.

There are still four more turns to play, however, it may be that there isn't another major battle in the campaign, and if there is, it probably won't be as big as both sides took damage. We've each lost a complete division and two of the remaining Confederate divisions have been reduced to a single battery of artillery. There might need to be a bit of re organising to make things make sense.

A battle in the east is possible, but the Confederates need a couple of turns of reinforcements before this can happen. However a few more skirmishes are possible in the interim.

It's definitely not over.

Saturday, 8 April 2017

Vicksburg: Gibraltar of the West


I've been threatening to do a campaign for a while, and a couple of weeks back we managed to get started on one. It's a American Civil War campaign set in 1863 featuring, unsurprisingly, the Union attempts to capture the Confederate stronghold of Vicksburg in order to free up the passage of the Mississippi and cut the Confederacy in two.

I'm not going to go into the history as, if you're interested, there's a plethora of resources available online, one of which is a set of free campaign rules for the game Altar of Freedom, which I've adapted for our use.

During this campaign, Matt and I will be commanding the Union army under General U.S. Grant as he takes the long route round to surprise and besiege Vicksburg. Meanwhile, Pete and Wes are controlling the motley collection of Confederate forces assembled under the hapless General John C. Pemberton, and potentially General Joseph E. Johnston, with the goal of holding of the Union forces for as long as possible.

The campaign takes place over 8 turns and each turn features an event card and various forces trying to outmanoeuvre each other. The campaign, realistically, is not likely to feature many major battles, but those that do happen will matter a lot.

What follows is an account of the first few turns.

Deployment


For the Confederacy, Pemberton's forces are mainly massed around Vicksburg, with outlying pickets and divisions stationed at Warrenton and Edwards Station. the city of Jackson is only sparsely defended, but the campaign allows for the possibility of reinforcement there, so any planned assault would have to be quick before it becomes too well defended.

The Union army is stationed around its supply depot in Willow Springs. Sherman's Corps is to the west, McClernand's Corps is in the centre, closest to Vicksburg, and McPherson's Corps is in the east, looking at the longest route to any planned destination.

Turn 1 - Soaking Rains

Several days of rain saturate the roads,
turning them into muddy quagmires.
The Union assault gets off to a slow start as all movement is severely hampered. McPherson's Corps trudges slowly northwards towards Utica, whilst McClernand's Corps limps towards the Big Black River, only to find that Confederate pickets (not pictured, for some reason) have destroyed one of the ferries, limiting their opportunities to cross. Sherman's Corps is completely unable to leave Willow Springs due to the inclement weather. There is some movement amongst the Confederate forces, but they are happy to sit tight and let Mother Nature fight on their behalf.

Turn 2 - Panic in Jackson

Fearing for the safety of the capital,
Johnston evacuates Jackson in haste.
For reasons known only to himself, General Johnston evacuates Jackson leaving the Confederate forces under-supplied and with less ability to move and respond to the Federal army. Perhaps it was the fact that McPherson was clearly heading towards undefended Jackson, with some of his troops reaching as far as Raymond.

Meanwhile, Sherman finally gets his Corps moving north towards Warrenton whilst McClernand reroutes his forces to cross the Big Black at a different point, thanks to the actions of the Confederate pickets.

Turn 3 - Lost Courier

Couriers riding between Johnston and Pemberton
are captured, delivering intel to Grant.
More misfortune for the Confederacy, however, in this case the intel received was their current score of victory points, and Matt and I were surprised that simply by the being no Union troops surrounding Vicksburg, Pete and Wes were already almost half way to victory.

Their discovery spurred the Federal troops into action. McPherson's Corps continued it's fast advance, cutting the rail lines at Clinton, in striking distance of Jackson. McClernand pushed on to almost the outskirts of Vicksburg, but was unable to make contact with the enemy.

This was not a problem for Sherman, however as Blair's Division clashed with Bowen's Division at Warrenton. Fully aware of the full might of the Union army massing in the countryside around them, Bowen retreated back to Vicksburg before he was cut off.

With Grant at the gates of Vicksburg, a major engagement was surely imminent.

Turn 4 - Old Grudges...

Still simmering with personal grievances,
McClernand protests Grant's orders.
McClernand was clearly unimpressed with the idea of leading the assault on Vicksburg and refused to move, so it was left to Sherman to initiate battle, which he did with zeal. Dispatching Blair after Bowen and then sending Steele across country to draw Smith into battle. This would surely pull Pemberton out from the Vicksburg defences and force McClernand to get off his behind and into battle.

A major engagement ends all further action for the turn as the battle is fought.

The Battle of Vicksburg

The battlefield is outlined in red.
The coming battle is going to be a tough ask for the Union, who, despite having a slight advantage in numbers and artillery, will begin the game with only a single division deployed on the table, facing a worrying four Confederate divisions dug in around Vicksburg. However, as the battle goes on, reinforcements will arrive by road from the south, west and east, potentially allowing the Union to outflank the rebels and bring their numbers to bear.

The consequences of this battle could be dramatic. A rebel victory will surely see them amass enough victory points to be within touching distance of victory, whereas a Union victory will drive the Confederates out of Vicksburg and completely change the complexion of the campaign. This one matters.

Amassing the Army

The size of this battle required a bit of painting in order to provide enough troops, so I've done another three units of 6mm Union infantry, and a few more commanders. Technically, I've painted these units up as US Colored regiments (you might just be able to tell), but they won't serve in this capacity in the battle as we're a couple of years too early for them.


I now have all the troops that I need to be able to take control of Sherman's Corps in the coming battle. I will be attacking from the west, closest to the Vicksburg defences, whilst Matt, as the recalcitrant McClernand, will be entering via the east and south, rushing to support my advance units. I'm not sure how Pete and Wes are dividing their forces, but they will have to watch their flanks as the advance.


The results of the battle will be in the next post...

Sunday, 2 April 2017

Man The Barricades


Another week and a few more Walking Dead: All Out War miniatures. This time it's the Shane booster pack which can with three miniatures, two character cards and four equipment cards to add extra elements to your games


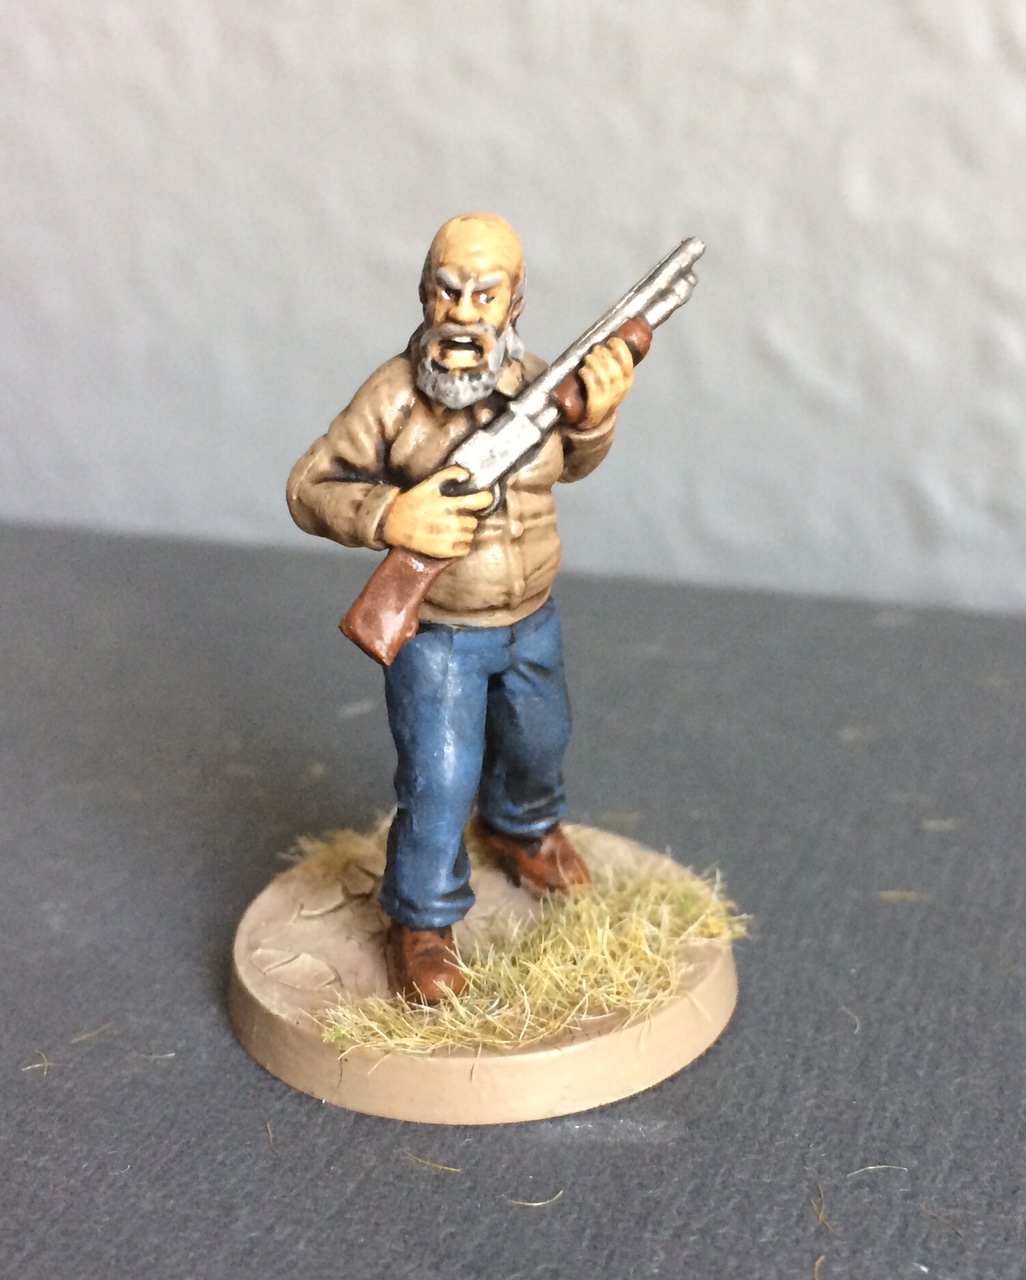
First up is Reggie, who is apparently based on the comic book criminal that shoots Rick, putting him into a coma for the beginning of the zombie apocalypse. In the game, Reggie is a basic mook, who can be added to any group, but will most often find himself alongside the likes of the Governor, Negan and other bad guys, simply because there are already plenty of Rick's group to choose from.

I kept to a very basic paint scheme, simply because I couldn't see a reason to do anything special with him. I'm quite happy with how he's turned out.


Obviously, the Shane box also includes Shane, Rick's partner, friend and rival for the affections of Lori.

I really like this model, event though, like the rest of the range I've seen, it's a really simple sculpt. The jacket has enough details (the trim, the badge, the pockets) to really make the model 'pop'. I did contemplate putting 'police' on his cap, but my freehand lettering is always terrible, and I didn't want to ruin a model I liked so much.


Typically, each booster pack includes a walker, and amusingly, this pack contains Zombie-Shane. This made painting him even quicker than usual as I didn't have to make a single decision about colours, as I just painted him in tandem with Shane, using exactly the same palette.

My only gripe with this set is that Zombie-Shane's base is slightly warped. I probably could have fixed this with the hot water trick, but I only noticed once he was finished.

It remains to be seen whether I'll use this model as much as the other walkers, simply because he's so recognisable, however, there is a mechanic in the game where characters killed by walkers or bites are replaced with a walker, and so I'll always keep him on hand when Shane's in use.


Finally, I've painted a couple of piles of boxes of canned goods. These are from the Mars Attacks game which I don't really play. There are a range of terrain pieces that are more than suitable for adding to my games of The Walking Dead. These will serve equally well as either small barriers for cover, or supply tokens.

I continue to really enjoy painting this stuff up, and so expect to see more in the coming weeks.

Sunday, 26 March 2017

Back From The Dead

Sorry for the absence of posts for the last couple of weeks. A combination of busy times at work, family events at weekends and suddenly playing catch up with a number of TV series has curtailed my painting and playing time recently.

However, normal service should now be resumed; and what better way to get back to business than with a new game- Mantic's Walking Dead: All Out War.


For a variety of reasons, I've been resisting this game for a long time. I resisted the Kickstarter last year because I'd backed the Dropfleet Commander Kickstarter at around the same time and I already had zombie stuff. After Christmas it was, well, after Christmas and I figured I should be able to hold out until my birthday in April.

I was wrong.

Gameplay videos started popping up on YouTube and not only did the miniatures look good and characterful, but the mechanics appealed to me, as did the fact that there are fully functioning solo rules. In an attempt to stave off temptation, I got back into watching the TV series (which I'd stopped midway through series three), but this only made matters worse and a couple of weeks ago, I cracked and bought The Prelude to Woodbury Starter Set.

This isn't the full game, but a solo starter which comes with a single survivor, five walkers and almost everything that you need to get playing.


The survivor in the set is Brian Blake, aka the Governor of Woodbury. As you can see, the character design is based on the comic book rather than the TV series, and he's still got all of his body parts. This is because the three scenarios in the set detail his adventures in the outbreak before becoming the Governor (hence 'Prelude to Woodbury'), and in game, this incarnation is actually fairly average. I'd imagine that when they get to a Woodbury expansion, the Governor will have a few bells and whistles in his rules.


The five walkers in the box (yes, I know there are six in the picture...I'll get to that) are all individually sculpted. In fact, every walker in the game is not only unique (the only exception to this are the ones that come in the Walker Booster pack), but is also based on one that actually appears in the pages of the Walking Dead comic book. Compared to the Wargames Factory (now Warlord) zombies I usually use, these are chunky, but much better sculpted and a damn sight easier to assemble, given that they are all one piece sculpts.

I've stuck to my usual zombie flesh routines and kept the gore fresh with Citadel's ridiculously named Blood for the Blood God paint. I know that logically, the blood wouldn't still be glistening red on walking corpses, but I like it, and anybody trying to use logic and science in a conversation about zombies probably needs to take a long, hard look at themselves. Perhaps the only differences to my usual zombies are the fact that I've gone for a rural, dried earth type base effect (more on that later) rather than urban, and given that the story is set around Atlanta, there is significantly more denim knocking about - a stereotypical view of the South, I'm sure, but it makes sense to me.


Given how much I enjoyed painting the contents of Prelude to Woodbury, I picked up my first expansion booster this weekend. Each of these (with a couple of exceptions) come with three miniatures, which are usually two survivors and a single walker, along with a number of game cards to add to the resources you have available.

The Carol booster includes Carol (unsurprisingly), who is much less of a badass and significantly more unstable in the comics, and her daughter Sophia, who apparently doesn't end up shambling out of a barn either. I also got four equipment cards, to add to the four I got with the Prelude to Woodbury set, and an alternative character card for Derek, a character in the main game box. Until I get the main box, there's no reason why I can't use the Derek card with another suitable miniature from my bits box.

Both of these are really characterful miniatures, and look suitably terrified. One of the issues I have with a lot of zombie miniatures, is that the survivors are mainly armed-to-the-teeth paramilitary types. I've always been more taken with the early stages of an outbreak, and the abject panic, hit-them-with-whatever's-to-hand set up, and this range really suits that aesthetic. Sophia is probably my favourite miniature in the range. Partly because it's a great sculpt with nice details - her hood has cat ears - but also because I've been able to give her a completely impractical bright pink coat.

I'm not sure how effective either of them will be in game, but they were fun to do.


You may also notice that I've been doing something different with the based. To simulated the baked earth of the Deep South I see in the TV show, I've used one of Citadel's textured paints, Agrellan Earth, for the first time. I've done an undercoat of Baneblade Brown (where do they get these names?), then liberally dolloped on the textured paint. After leaving this to dry for a few hours, it naturally cracks. A quick drybrush with Ushabti Bone, and then some static grass in the sections without cracks, and job done.

I'm really happy with this effect, as not only is this really simple to do, but using sand on integral bases always has the effect of making seem like the feet are sinking into the earth.

I'm really enjoying painting the Walking Dead miniatures and you can expect to see more pop up on the blog over the coming weeks. I've run through the solo scenarios from Prelude to Woodbury, which although a bit limited, gave me a good feel for the game, and I also played a two player game against Wes, who's also bought in, and can only report good things about how the game works.

I'm now looking forward to getting creative and making some scenarios of my own in the coming weeks, as well as adding some suitable terrain.

Sunday, 5 March 2017

"I paint the models eclectic..."

Yes. I have just referenced Fame: the Movie in the title of this post. Deal with it.

After a bit of a slow down during February, I've started to get some painting done in an attempt to clear the little bit of a backlog of assembled models that had begun to build up, and so this post is a little bit all over the place in terms of theme.

Also, the weather's rubbish, so you'll have to put up with fairly rubbish photos. Sorry.


First up are three members of the Suicide Squad for the Batman Miniatures Game: Killer Croc, El Diablo and Slipknot.


This version of Killer Croc is significantly smaller than the model I've already painted based on the Arkham console games. However, he's still fairly chunky.

I really enjoyed painting this model as he's relatively simple. He's also a one piece sculpt, so it was nice to put together a Knight Models figure without the usual cavalcade of swearing. My only gripe is that some of the fine detail on the back of his coat disappeared under a single coat of paint. This is increasingly something I'm encountering with Knight Models sculpts, and with my wash-based painting style, shallow detail causes problems.


I found El Diablo really intimidating, mainly due to the face tattoos. This is one moment when I'm quite glad that the photos are a bit dodgy, however, I do feel that I've got the tattoos as good as I'm able to and as long as you don't get too close, I'm relatively happy with him. It's just a shame that his rules are so duff, so I don't expect he'll see a lot of table time.


Slipknot is an uninspiring sculpt of an uninspiring character from the Suicide Squad movie. Again cursed with the shallow details that don't really work for me, a bizarrely separate leg and a pose that makes it look like he's just soiled himself.

He's done. That's about all I can say. Not massively impressed.

Right, that's enough BMG. Now for something different.


Yes. I know he's a superhero. But he's not a Batman character...or a Marvel character.

This is Doc Cosmos, an extremely limited edition miniature I was very kindly given by Leon of the Eclectic Gentleman Gamer and Pulp Citizen blogs. He's specifically been designed for a game Leon is working on called Supers Unlimited, and I'm looking forward to give him a run out in some play-testing for that.

This is a really cleanly cast, single piece model without much in the way of fiddly, extraneous detail - exactly the kind of model I like.


You might also have noticed that the models above have been photographed in front of some new terrain. The subway entrance and recycling bin are from 4Ground and are pre-painted MDF models.They go together really easily (although I did muck up the subway initially, and had to take it apart and start again).

Not only are they pre-painted, but the instructions come with the signs printed on them (and some steps, in the case of the subway), making them a really good choice for quick, attractive terrain.


Finally, some more spaceships.


My Scourge fleet continues to grow with the addition of a Basilisk Battlecruiser and three Nickar Corvettes.


The Basilisk is a Kickstarter exclusive model and uses the standard cruiser sprue, but adds resin pieces for the dorsal crest and side fangs. As with all Hawk Wargames models, the pieces are beautifully cast, fantastically detailed and fit together perfectly with a minimal amount of trimming and cleaning required.


In game, the Basilisk has an array of damaging occulus beams which have the potential to inflict significant amounts of damage. What's more, the Basilisk has the full cloak special rule which means that it can never pick up any spikes, meaning there is no reason not to fire all of its weapons, all of the time.

I'm looking forward to using it.


The Nickar Corvettes are actually scratch built from spare parts I have left over from my frigate sprues. I've done this for a few reasons, firstly there is the issue of cost and I'm always keen on being cheap. Secondly, the sprues have lots of spare parts, so it seems a shame not to use them. Thirdly, I've seen the official models, and I'm not actually that keen on them. Finally, the official models aren't actually available yet, and if I'm going to be able to do anything about Matt's Shaltari Voidgates, I need these guys now.

I'm really pleased with how these models have turned out, and I will almost certainly be making some more. Hopefully, they should help out with my complete inability to attack enemy ships in atmosphere.

It's all been a bit of a mish-mash, but at least I'm getting stuff painted.

More soon, I hope...